Showing posts with label ATC. Show all posts

Thursday, February 2, 2012

Thursday Tutorial

Hey Peeps.  Lots of creative juices flowing these days although I can't share everything with you yet.  In the meantime I thought I'd post a past tutorial I did for SNR magazine.  Its another ATC, but I encourage you to see how the techniques involved could be used on projects you like to do.

Two Hearts ATC Tutorial
 
Two Hearts by Scarlett Salamone Supplies Patterned Paper: Little Yellow Bicycle, Bo Bunny; Brads: The Paper Studio; Gel medium: Liquitex; Tar Gel: Golden; Paint: Jacquard; Other: Confetti, mesh, ticket, cardboard  

Supplies:  Cardboard, Gel Medium, Tar Gel, Brads, Fabric, Netting, Paint, Patterned Paper, Confetti

Step One: Adhere patterned papers to cardboard using gel medium or adhesive of your choice.

Step Two: Mix confetti with some gel medium and spread onto base.

Step Three: Cut out two hearts from fabric and two from netting.  Stitch together.

Step Four: Crinkle up a ticket and add paint to the edges/wrinkles using your fingertips.
Step Five: Adhere tickets and hearts to base using gel medium.

Step Six: use a wire cutting tool to snip the backs off the key and lock brads and adhere to base using gel medium.  You could surely keep the backs of the brads on, but this is my little trick to not have a hole poking through the back of my project.

Step Seven: To finish off the ATC, mix tar gel (not shown) and paint together and spread generously around the edges by scrapping the mixture off a brush onto the edge.

Here's the finished project one more time:

If you have any questions just holla' and I'll help the best I can.

Until next time, take care.


Monday, January 23, 2012

Valentine ATC Tutorial

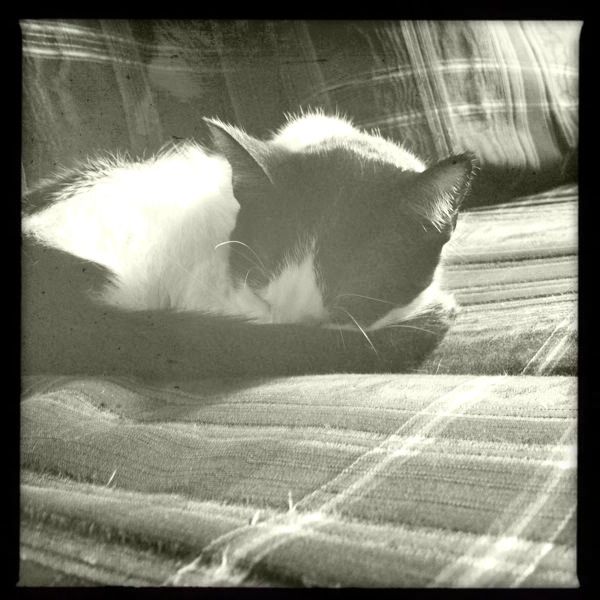
Hey Friends, Happy Monday to you!  Its been rather busy around my homestead these days.  Nothing exciting, just lots of chores around the kennel now that Winter finally arrived in WI.  Not that I'm pleased with that at all, but hey it is WI.  I also took a slight break due to a nasty burn on my inner arm.  Our cats:

Culprit #1


Culprit #2


They look sweet enough during the daytime, huh?  All curled up snoozin'. But lemme tell ya' by night its a whole nother story.  They love to romp, play, and chase each other - Okay, no biggie.  They love to find little snibbles of stuff in my space and bat it around - Eh, not as okay but I guess.  They often knock completed projects I've got on a drying rack down and each project somehow makes it behind our pellet burner - TOTALLY not happy about this at all.  So it was on one of my ventures behind the ol' pellet burner that I nailed my arm ever so quickly on the back pipe. Not cool.  Pain, swelling, and redness instantly.  Blisters came very quickly after that.  My story does end happily as I'm just fine thanks to some good tips from friends, but I'm still ticked off at the cats, LOL!

Alrighty moving right along to the tut!  This is what I'm going to show you how to make:


The supplies you need are as follows: 


Cardboard, mini buttons, chipboard and metal numbers, glitter (two different types if you have it), glass beads (regular beads would work fine too), paint, coarse pumice gel (any texture paste could be used), heart shaped cookie cutter


Step One: Mix pumice gel and paint together.  Spread on cardboard base.


Step Two: Press cookie cutter onto wet pumice gel.  This will serve as a shape holder.


Step Three: Pour glass beads inside of cookie cutter.  Gently press down to help them stick.  Sprinkle glitter around the outside edges of the cookie cutter.


Step Four: Remove cookie cutter and place mini buttons along the impression to create a heart.  Using tweezers, add the numbers to the middle of the heart.  Sprinkle extra glass beads on any bare areas.
There you have a quick and easy Valentine ATC, but wait you might be asking yourself what good does this do me?  I don't make ATCs.  Well I challenge you to think about how any of these techniques could transfer to your cards or LOs.  Using pastes and gels to embed things on LOs and cards is just as cool. ;0)
Hope you enjoyed the tutorial and find something useful from it. I originally did this tutorial for Scrapbook News and Review Magazine last year.  I'll be back again soon, until next time -  take care and be blessed and a blessing to others. 


Tuesday, January 10, 2012

10 Things on the 10th

Hey sweet peeps!  I was browsing the internet today and I happened upon Shimelle Laine's blog.  She had a post for today called 10 Things.  The idea is to create a post on the 10th of every month sharing 10 Things.  I thought that might be something fun to try and what's fab-u-lous is it doesn't have to be scrappy related.... any ten things go.  I don't share a whole lot of stuff here other than my creations, but I am hoping to get a wee bit better about that in the New Year.  This may be a fun way to incorporate and share other aspects of my life here with all you.

So here's my ten for today.  I decided to do my last top creation recap and share my favorite mixed media heavy projects from 2011.
 
 Reach High for the Stars - This is a canvas created for Scrapbook News and Review Magazine.  Each month (just about) last year I made a step-by-step piece for a tutorial article.


Art Doll - This sweet little doll is hanging out on a shelf in my creative space.  I loved using all the bits and pieces that brought her together.


You Are Loved - This tag holds some journaling on the back as part of my Attitude of Gratitude mini album I created in November while following along with Tessa's Attitude of Gratitude posts at Perfectly Precocious and Art Everyday Month at the Creative Everyday blog.  I love this stamp and have had fun decking this girl out in many different ways.  Mists, watercolors, and paints are my best friends for coloring stamps these days - add in a touch of paper piecing and I'm a happy girl!


Right Now - This is prolly my most favorite art journal page eva'!!  Well up to this point at least, LOL.  It all came together after a not so fab start - so great when that happens, right?


A Home - Another canvas piece for my article series.  The texture on this one makes me giddy and I have a hard time not putting my hands on it!  Good thing its hung higher up on the wall, hehe.


Enjoy the Journey - This is a necklace my sweet friend's gorgeous daughter wears from time to time.  Her bedroom theme is Curious George so I always have a blast finding little things with monkeys I can make for them.  I know a lot of people smoosh their bottlecaps before using them but I really love to keep them in tact and fill them up.  They make terrific embellishments.


Always in my Heart - I had to include this page because its so dear to me for many reasons.  This precious, beautiful young lady will always hold a place in my heart as a daughter of sorts.  The story of our journey is well documented on this page and looking at it I'm amazed at how much I wrote - so not typically me.  I also have a soft spot for this page because its the first background I ever created to build a LO up on.  I'd use goops and such to add elements, but never the base.  


I have no good clue what I titled this - but I adore it.  I made the little dresses out of clay and delighted in hanging them up on the little clothesline. 


To the Moon & Back - Since my son was little we've always said love you to the moon and back so it seemed fitting to make him a wall hanging - at 15 we don't say it quite as much ; ) - every once in awhile though and it warms this mama's heart.  Lots of fun layers here and gotta love a paper towel roll rocket!!


I Think I Can - A simple ATC showing off my new favorite chipboard (and doilies - I seriously canNOT get enough of LeeAnn's doilies) from The Chip Chop Shop , a love of clouds and all things shimmery.  Oh and don't forget the tar gel edge - LOVE that stuff!!!

So that's my 10 things.  Here's to hoping I remember to do this next month, LOL.  What 10 things can you share today?


Wednesday, October 5, 2011

Plain Crazy

It makes me feel old every time I think how quickly time goes by. Do you know what I mean? Like when I was younger I listened to 'older' people say this all the time, "time goes by so fast." Me, being the youngster, thought time couldn't go quickly enough (mind you I was a rather awkward teen, LOL). Anyways, it's plain crazy to me we're already into October, where did the year go? It's plain crazy to me my son is going on his first real date this coming Friday. What happened to this mama being the only gal he needed? It's plain crazy to me my daughter has almost the same size foot as me and can share some of my clothes. What does she think is going to happen when I find out she snuck some of my clothes out of the dryer into her room (oh yeah, it's bad. LMBO)? Time goes by....quicker than we think.....I blinked and all this stuff happened, plain crazy I tell ya'. What's plain crazy in your world these days? Do share.... I need to know I'm not the only one. ;0)

Alrighty, so the theme of this post is plain crazy. Let's see what projects I have stashed away to share that might fit the bill.

Oh the Things You Can Think


This was a totally fun ATC to make. I started with a shredded paper base and built up with an image transfer, staples, beads, mini confetti, and text. The image is from Graphic 45s Steampunk collection; I love how well patterned paper works for transfers.

Seek It Out


This is a quirky lil' canvas I made. If I remember correctly it's 5x5, by I'm not completely sure on that. I had a great time mixing bold colors and patterns. I'm also pretty pleased with all the scraps I've been using up on canvases like this one. Does my heart good knowing I saved ALL those snibbles for good reason, ROFL.

BBQ at Claw's


I created this LO on a paper bag. I covered it with some geso first and then went to town layering paints, papers, stamps, ink.... you name it and it's probably on there somewhere. What I think is cool is how there's a lot of dimension to this LO, but not a lot of bulk. Very new concept for me, LOL. I even used machine stitching!!!!...... also very new to me.

So there you go some crazy projects and info from me for today. All the above projects were previously published in Scrapbook News and Review Magazine. Have you been to the site lately? There are new events live and ready for your viewing pleasure. Serendipity stamps, Technique Tuesday, and Jenni Bowlin are all going strong and loaded with tutorials, classes, and inspiration.

I've got some stuff posted for Jenni Bowlin, including a tutorial on how to layer papers, mediums, and textures. Go check it out; I think you'll like it.... at least I hope you do.

Hope the day treats you well, it is what we make of it, right? It's supposed to be gorgeous here today so I'm going to make sure I enjoy it while I can....I'll be doing chores, but at least it'll be warm and sunny.
~Scarlett


Monday, August 22, 2011

Monday Madness

So I've got the pictures all taken for the tutorial I wanted to share here. I've got to edit the pictures and get the tut written up, so hopefully I'll have a tutorial Tuesday for you tomorrow! YAY!

In the meantime, I'll share some projects published in past issues of Scrapbook News and Review Magazine.

Bless This House

This card was created and pubbed for an arrow shaped card call. I started off with an arrow base and when I saw it laying on my table pointing up I instantly thought of a house. Go figure.... I've got a slight obsession in including them in my creations. LOL

Wander ATC

This is probably one of my favorite ATCs. I created the background by painting a paper towl, then stamped here and there. I added the foil butterflies, colored with alcohol inks, and then the image transfer. To complete the gypsy feel, I made some charms and inked up a word charm from Tim Holtz.

Freshman

Wow, I can't believe how fast 2011 has gone. I made this LO last Fall to document my son starting high school. It's tough to swallow he'll be a sophomore this year! I had fun with some masking on this LO and now that I look at it a year later, I think I need to go back and hit those letters up with a black pen or some NeoColors. The tag sticking out is covered in chalkboard paint and the journaling is done in chalk that I sprayed with a fixative after. In hind sight I think I would have rather used white pen or paint. The writing would have looked nicer and I could've gotten more on it. I'm all about the journaling these days..... shocking I know! LMBO

Alright one more because I couldn't resist it.

Laundry Line

Hands down this is my favorite tag EVA'!! It was a labor of love for shiggity, but oh so worth it. The dresses are created out of polymer clay. I baled them up and then painted, stamped, and embellished them. The background is real simple, paint and some stamps/drywall tape. The grass was made out of some specialty paper. I've been really trying hard to work through my stash of things and I'm pleasantly surprised at how many uses I've found for this paper stash. I think I might punch out a butterfly (or 2 or 3 LOL) and add them to the clothespins. They look a little nekkid, don'tcha' think?

Hope you've had a wonderful Monday. See you soon.


Friday, August 19, 2011

ATCs for Friday

Hi Friends! Happy Friday! Do you have big plans for the weekend? My DS has his first football game tonight and DD has some softball stuff, but other than that it'll be a relaxing weekend.

I have a bunch of ATCs, previously published in Scrapbook News and Review Magazine, I've not yet shared here so I thought that would be fun for today.

Spring is Here

Spring has been here and is gone, just like summer's about to be. YIKES! How did it go by so quickly?? To create this ATC, I started off by painting the base with some spring colors. Then I stamped over it with a script stamp and then again with a flower. After that I added the papers, flowers, and trim. I love those little felt flowers and will work on a quick tutorial for those today to share this weekend. I really want to get at giving you all some more tutorials and fun stuff throughout the week! WooHoo!

Dare to Be You

I must say when I made this ATC never did I imagine I'd love how the shades of purple looked. I do however and it's becoming a more used color in my world thanks to my BFFs hubbie. To create this ATC, I painted the entire base with shades of blue and magenta. This mixed into all the purple shades you see. Then I spread some light molding paste through a negative punch of a butterfly and some faux punchinella I created with a hole punch. Then I went over with paints again. Next I added lots of glitz and shimmer with some Perfect Pearls. My BFF hooked me up with some amazing colors and they are outta this world! I dusted the PP on the butterflies as well as little dabs here and there over the whole piece. To adhere the star confetti, beads, and the bling, I used some gel medium.

Rock Star

This was such a quickie! I brushed on some red paint, went over with white paint on bubble wrap, attached the corrugated cardboard with gel medium, added black paint and embellies and I was done.

Fly Away

This one emerged from some playing I was doing with light molding paste. I wanted to try out carving into it and creating a background. First I laid down a generous layer of light molding paste and then carved my cloud shapes in it. I set this aside and let it dry overnight (24 full hours to be exact) then I went back in and added paint and some Diamond Dust with gel medium. The last touches were the butterfly and writing the words fly away. I love Sakura pens! I was amazed at how well it wrote over the painted paste.

Well before I leave today, I have a few questions for you. I really want to beef up my blog and have this be a place where you can come for inspiration, how tos, and more. In order to do that, I'd love some input from you all! =)

What would you like to see more of on this blog? Scrappy stuff, tutorials, mixed media stuff....

How many times per week would you like to see new posts?

Tell me something about yourself. I'd really like to get to know who stops by.

If you can take just a few moments and share what you're thinking I'd be beyond elated. Like I said I really want my blog to become more interactive and less just eye candy posts. I have lots of ideas (some in the works already) and would love yours!

As always, thanks so much for stopping by. Have beautiful days with much laughter!
~Scarlett


Friday, July 8, 2011

Projects to Share

I love being a part of the Scrapbook News and Review staff. I have been pushed creatively and love every minute of it. I create like a lunatic each month and have so many wonderful projects I'm always dying to share here and before I can I'm all caught up in creating more.....giggling......so I thought I'd try and get some of those posted today to share. I'm not going to do detail shots, but if you'd like to know more about any of the projects I share feel free to email me. I'm going to add a contact link on my sidebar. I think this will help me feel like I can share more because I won't be going back to old projects and trying to edit out new pictures. So let me know what you think. Do you want to see deet shots and bit of explanation here or would you rather just see some projects and ask questions if they pop up?

Phew, chatty today aren't I?! On to the creative business at hand.

Discover


This is a wordless LO I created for a one word title call. It's made on sticky back canvas and basically the only things I used to create this were: paint, buttons, UTEE (the letters), glitter, and a few rhinestones.

Fly Away


This is an ATC created for he Strut Your Stuff call. This was such a fun project to work on. The background is molding paste I carved into with a chopstick I believe. The sprinkled some glass glitter on it and let it dry. Once it was dry I painted over certain areas and added the butterfly with some heavy gel.

Debutante


This card was created for a sketch call. I think by the time I was done, my card may not have looked much like the sketch any longer, but the basic design is there. I wish the pictures of this card could show all the additional mediums that were used to change up the papers and add texture and glitz. I used pearl ex on the papers to highlight certain areas, my own glitter glue mixture for the wings, embossing powder, and Sakura glaze pen for the crow. It's really gorgeous in person.

And how about a set of inchies to end with. They're so cute and fun to do!

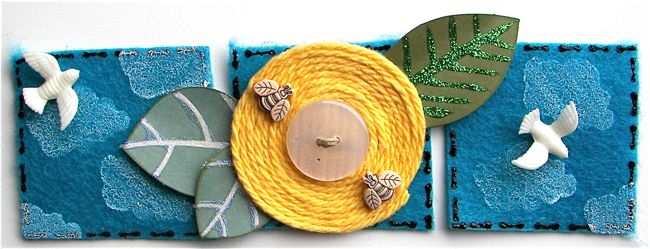
Birds and Bees


These were done for a fabric background call. I used felt and stamped on it with a stamp I carved myself along with paint. Then I outlined the squares with faux stitching using a puff paint. The flower is made with yarn on a cardstock circle base. Add a few birds and bees along with a button and called it a day for these. I think they're totally adorable.

Alright, well there you go. Some new projects to check out. Hope you enjoy looking at them, let me know what you think. I'd love to hear from you. Be sure to head on over to SNR. There's a great forum to join in on, fabulous front page projects, and of course the magazine itself is off the chain!!! For real. If you don't have a subscription, I have no idea what you're waiting for!!!!

Have a great day!


Wednesday, June 8, 2011

ATC Challenge

Is it hot by you??!!! It is crazy hot here and I am glad to have a day to stay inside (mostly) and scrap. Hope you're finding plenty of "cool" things to do.

It's my month at My Sketch World to host a challenge and I'm all about havin' my gurls there try new things so I went with an ATC challenge. I did this the last time I hosted a challenge and it was seriously cool how many friends played along and how amazing their creations were! So I know they're going to blow my mind again.

My challenge is to create an ATC with the word BLISS as your inspiration. You can use the word, be inspired by the word, share an ATC that shows what brings you bliss, whatever......just make an ATC about it! Here's what I came up with:


I haven't decided what to title this yet....hmmm....if any of my fabulous blog friends are reading this and have a good idea, let me know! Smile.

It's pretty cool how this came about. I created my background and then while I was looking at it to figure out the next step, I started seeing all these shapes and picture formed. Kinda like those wonky posters and wall hangings that you stare it.....ooo they make me sick and I can never see the picture! Sorry, back on track. So this picture came into play and I outlined it all with a black pen. Then I started painting in the shapes with some fluid acrylics and outlined with my blac pen again for dimension and definition. I am thinking I may do a tutorial on this.

Here's a different angle to show you the glitz and texture it has from some Sparkle Mod Podge.... I don't use Mod Podge that much any more since finding other mediums, but let me tell you..... this stuff is fun! If you like sparkle you need to try this stuff out.


This picture really doesn't even show the beauty of the sparkle. Gotta work on getting better shots.

I hope you pop on over to MSW and play along. I'd love to see you there!

And here's a little FYI, if you're interested. You can check out some of my art journal pages I've been sharing at Scrapbook News and Review Magazine. I show step x steps and talk you through getting started in your journal. Let me know what you think if you pop over. Big Smile!

Hope you have a beautiful day wherever you are and wherever you may go.


Monday, June 6, 2011

Long time....

no blog. No need to get into all the deets of things, let's just say I have had my fair share of busy, full days. Thank goodness that has meant some scrappy time as well here and there or I'd be nuts!

So onto the scrappy haps at hand!

Check this out, k? I've been a staffer at Scrapbook News and Review Magazine for over a year and let me tell you it's amazing. I love every minute of what I do there. Anyhoo, we all have been working so hard to really get some new things going and let me tell you......they're fresh! (2 jam packed issues per month for only $4.99!!!!!!!! Are you kidding me? Not only that, but once you sign up you'll get access to back issues as well. The 1st issue is jam packed with a TON (we're talking like 4-500 projects people!) of eye candy and articles for you to sink you're teeth into. As if that's not enough 2 weeks later the 2nd issue is comin' at'cha and you will find dozens of tutorials at your fingertips! This month alone there are tutorials from myself and others on these topics:

Scrapbooking Tutorials
Anglaise Pretties
Coloring Trim
Fabric Butterfly
Fabric Paper
Twisted Fabric Blooms
Adding a 3-D Effect to a Photo
Adding Text to Fabric
Coloring Black-and-White Photos with Chalk
Coloring Black-and-White Photos with Copic Markers
Curly Fabric
DIY Photo Overlays
Fibers Fabric Paper
Fabric Shapes
Ribbon Curling
Twisted Fabric Flowers
Using Dryer Sheets to Make Embellishments & Create Interest


Cards & Stamping Tutorials
Faux Stitching
Fork Bows
Heat Embossing on Fabric
Heat Embossing on Photos
How Do I Attach That? - Ribbon
Stamping on Velvet


Mixed Media Tutorials
An Introduction to Gels, Mediums & Pastes
Adding Cardboard to Your Project
Baby Wipe Background
Canvas Breakdown: A Home
Crinkled Cardstock Background
Gels, Mediums & Pastes Primer
Paper Towel Background

Shut the front door, right?! You know your jaw just dropped. LMBO! You really need to get yourself a subscription because we've got more awesome things to come and you will NOT want to miss out!

Moving right along......

My Sketch World is gearing up for summertime!!! WooHoo! That means lots of chatter on the board, fun challenges, sketches, and crops going on. Lucy is doing it up big this year and I canNOT wait! But before the crop starts in July......we have to get through June. The best way to do that is with some great sketches!

This month I did both the card and LO sketch for my DT duties. Here's the ATC I came up with:

I have really been working on creating my backgrounds myself by building up with patterned papers, paints, goops, stamps.....basically taking more of a collaged, mixed media approach. On this background I used patterned paper and misted dictionary paper. I tore the papers and adhered them with some gel medium. Next came some paint dabbed on lightly (I still wanted the bottom layer to show....*wink*), then some molding paste spread on with my finger, stamps with paint, and the rest of the embellishments.

All that came together using this sketch:

Here's more picture of it cuz' I think it shows off the sparkle better and I love me some sparkle!

Purr-ty, huh? Lots of pearl paint, PearlEx, and glitter!

Next up my LO for June. Can I just say it felt so super good to be scrapping with one of Lucy's LOs sketches. It's been a while. Here's what I came up with:

Stuck Like Glue

I really don't know why DH is so red in the larger picture, but such is life. I love this LO anyway! I used this sketch in creating it:

Fab, isn't it? I didn't get a chance to do any close up editing, maybe for the next post. There are a lot of fun little things going on on the page. I do have a challenge posted as well so be sure to head on over to MSW to check that out. I'll be blogging about it tomorrow? Well, that's the plan.

Well enough for tonight. I sure thank you for coming by and visiting me.

~Scarlett~