Showing posts with label neocolors II. Show all posts

Sunday, September 21, 2014

Happy!

Greetings!  This is a late night post for me as days are busy, but it is a happy one!

First off I must share I've joined the Let's Scrap DT - Woot!


This is super exciting as back in the day it was one of my very first teams and now to be back with them is a joy.  There are oodles of changes as well.  Gone are the days of the Ning site.  While this is a bit sad, I think ultimately it is pretty cool the challenge site is now blog based - it makes it a lot easier for all of YOU to play along!  There is also a Facebook page for anyone on that social network so be sure to check us out there too!  This is where the chattiness happens. ;)

My first sketch reveal was with this team thos past Wednesday and here is what I came up with:


I've been working diligently on using my stash and I love this October Afternoon line with the Campbell Soup kid-like images so much.  I couldn't resist using them on this card.  The background here is a heat embossed resist using some of the new ScrapFX cloud stamps and NeoColors II, can you guess how much I love these stamps??! ahahaha!!


What I love about this technique is how it allowed the details of each stamp to still shine through.  Here you can see the word happy much better than in the first picture.  You'll also notice the little confetti speckles in the upper right hand cloud.  The color seeped into these areas yet resisted the clouds - love that.

Here is the sketch I based my design off:


And now it's turn.  Create a card, or LO if you choose, and link it up to the Let's Scrap site for your chance to win a prize from this week's sponsor.  Hope to see you playing along! :)

Until next time, take care!!

Sunday, September 14, 2014

Life's Tough

Hey There!  It's been busy, busy around here since Fall weather has decided to make an appearance a tad earlier than normal.  The chill in the air and and just under 40 degree mornings means we've been kicking it in to high gear to make sure the farm is prepared.  It makes for long days and a tired body at night that is for sure.  But I still have managed creative time and have back logged projects to share, so let's get to that shall we?


This page was created for ScrapFX and documents my baby girl's concussion she received playing softball, much to her dismay - ha!  The release of medical stuff from ScrapFX was perfect for my family sadly - yeesh.  We are a bit of an accident waiting to happen with two very active teens, a hubby that works with police dogs, and well you get the idea. ;)


I'm pretty smitten with the newer Ripples Stencil (2014155) and used it here to start off my background with some paste.  I thought it'd give the feeling of being dizzy you know??  Once it was dry I went over it with some paint and then added some stamping with the Spiral Spots Stamps (2014153)  to further the feeling.  The Life's Tough (2014183) wordlet was painted black and then splattered with some colored string gel.  I think it's definitely symbolic of all the chaos we were feeling at the time.  The string gel is also used throughout the page in other spots.

Here you can see one of those medical pieces in action.  This piece is from the ironically titled Ouch Pack (2014165).  I think it's kind of adorable for an ouch piece and would be perfect for little booboos on toddler type pages, etc.  But my big girl deserved it too. ;) 


Another piece from the Ouch pack and lots and lots of stars to compliment the ones on the other ouch piece.  I'm so glad I picked up a bunch of those mini stars ions ago when they were on clearance at Ms.  They're terrific to splatter on a page every now and then, a big mess to do so, but worth it. :D

So yeah life can be tough when you're a teen and catch a concussion playing the sport you love, but you live through it, your mom scraps it, and then you die a thousands deaths because gasp! the whole world is going to see the picture you already posted on FB.  LOL.  Ahh well, what'cha going to do??

I hope you all have beautiful days!  I'm off to do more chores on the farm and delight in the fact that the sun is at least shining.  Take care and remember ScrapFX is still having their DT call!!


Tuesday, August 12, 2014

Smile and the World Smiles With You - Canvas

Hello!!  My oh my, it's been quite the long time since I've blogged but it's time to blow the dust off and share up some creations again - wahoo!

Today's creation will give you a little insight as to what has been keeping busy over the past several months and let me tell you, it has been so worth it!


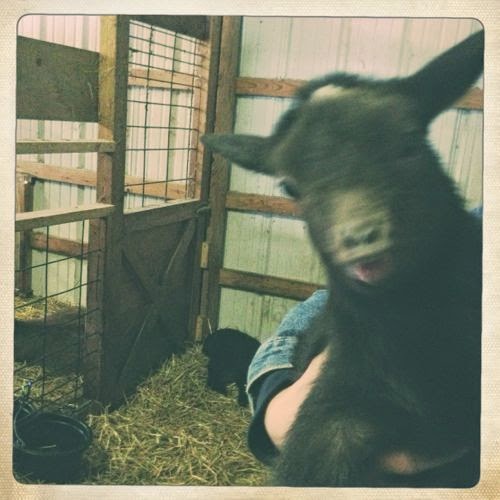
Meet Penelope, she is one of the Nigerian Dwarf goat kids we brought on to our little farm we started up this spring.  Yes we started up a farm!  Super exciting and a whole lotta work - phew.  It only seemed appropriate one of my first creations after being away from my crafty space for what seemed like foreva' would be to showcase one of my farm cuties - showing off a cheesy grin too, ha!

 
 I started constructing my little country scene by adding in some stamping using my ScrapFX stamps.  The cloud stamps are hand carved ones I made using the Clouds and Raindrops stencil as a template and the flower stamps are the foam ones available in the store.  The chipboard piece here is one of my favorites, it's a fairly new release and there are a whole bunch of pieces similar to this one but using different large words and smaller phrases below. The font is so fun and I love the perfect print below, don't you?

To create the background of the canvas I worked some layers and added my various acrylic paints.  I love being random and messy during this stage.  No real plan just slapping on the mediums.   I also knew I wanted to use one of the little mini suns here but it just wasn't cutting it on it's own, worked out perfectly inserted in the paperclip sun though.  Love it when I can seek out layering tidbits on my table like that. The leaves were also stamped from ScrapFX foam stamps and then colored with various shades of Neocolors, watered down to blend, then fussy cut to be added to the canvas.

Don't you just love Penelope's cheesy grin?  She is such a little sweetheart!  Definitely worth the time away but am so glad to be back.  Still feel like I need to find my full creative again but it'll come.  I've got more things to share and am slowly finding my way in to routines between 34 chickens, 5 goats, one of which is in milk so I milk twice a day, gardening galore to try and replace a good amount of my family's food, and oh did I mention piglets will be coming to the farm in November??  Ahahaha!  I love this life and can't wait to share it with you through my art.

Take care dear friends, be blessed.

Friday, April 18, 2014

Sharing Some Loves - ScrapFX Style

Happy Friday to You!  Today I'm sharing up a couple sneaks of projects I currently have posted to the ScrapFX blog featuring some of my loves.
 
 This first project features my love of the country life.  I'm so blessed to have my dreams coming true of building a homestead that involves chooks (chickens), goats (yay!! can't wait to bring my babies home next month!!), and a larger scale garden this year.  There is a tutorial posted on how I built up my background so be sure to pop on over and check it out. :D


Even though you can't see him in this shot - my boy is surely one of my loves!!  Here he is all decked out with the other gal that shares his heart.....ahh, young love is so sweet.  This altered piece will be gifted to his girlie today. Can't wait to give it her; she is a darling.

You can head on over to ScrapFX to see the full reveal if you'd like, I'd love it if you did!! :D

Thanks for stopping by today.  I hope you and your family have a blessed Easter!

Wednesday, April 2, 2014

Let's Celebrate!! Life, Projects, and a 500th Post Giveaway!

Hello! Hello!!  Oh my word has it been a while since I blogged.  Its amazing how time flies in a blink and life consumes you.  Thankfully it hasn't been all busted pipes and frigid temps this time around but rather baby planning has sucked up lots of my moments!!  Now before you go getting ideas in your head thinking I'm about to blow up with a big belly and get crazy cravings - ha! - let me clarify.  This is the kind of baby we're expecting:

Yep a little Nigerian Dwarf doeling named Twilight.  Isn't she darling??  Oh yeah and she'll have playmates too!


This cutie lil' wiggle worm yet to be named and 


This little cuddle bug we think will be named Lucy Liu.  I got to bottle feed this sweetie pie when we visited her and it was like the best thing eva' I tell you!  So amazing how quickly she sucked her portion right on down then licked her little lips so satisfied.  Adorable I tell ya'.

So yeah.  Beyond making sure our kennels were very much cared for over the tough winter we had I was in full preparation/learning mode for my little dairy goats.  We have plans to raise them up to become good lil' milkers and there is lots to do to get ready for them to arrive thus my absence, so please forgive me.  I still managed to create amongst all this though and therefore have oodles to start sharing again with you!  Hopefully I can be better at that. ;)


This Celebrate card is the perfect choice to kick things off with I think.  First of all it was made for my newest Design Team - Turtle Soup - a fabulous community of scrappy peeps where challenges, sketches, conversation, and friendship is shared.  Second, it has a ton of my fav ScrapFX products on it.  I love how easily a card can come together with their chippies and stencils.


I have to give props to my girl Luckie on the inspiration for the background.  She always is so brilliant with using her stencils so I had to give her style a whirl in my own way.  To create this background I outlined the ScrapFX Numbers Collage Stencil (2014020) with my Micron pen on my patterned paper.  Next I colored in portions of the numbers with my NeoColorsII.  To blend down the colors I used a waterbrush until I was satisfied with the look.  It was as simple as that.  I think the only thing I may do different next time is let the colors bleed out of the shapes a bit more to give it more loose watercolor type look (Luckie does this look brilliantly - check her out!!), but other than that I like it.

To keep the celebration going since this is my 500th post - geesh if I actually blogged more I could have surpassed this long ago LOL - I'd like to have a giveaway!!


A while back I was asked and given the amazing opportunity to read and review the book Gilt Trip by Laura Childs.  As I've read and reviewed a couple of her books before I leaped at the chance to do so again!  Here's a little snippet about the book:

"Louisiana businessman Jerry Earl Leland served only a fraction of his five-year sentence for white-collar crime, thanks to some political connections and a few greased palms. But he won’t have long to enjoy his freedom… After Jerry Earl’s early release, his wife, Margo—a much-married Garden District doyenne—throws an extravagant Get Out of Jail Free Party, complete with a Zydeco band, champagne ice luge, and waiters in ties and tails. The guest list includes many prominent New Orleans socialites, as well as scrapbook shop owner Carmela Bertrand and her best friend, Ava Gruiex. But sometime during the swirl of partying and drinking, Jerry Earl is brutally murdered—then stuffed inside a clothes dryer.
Carmela has earned a reputation around town for solving murders, and when the grieving widow turns to her for help, she can’t say no. But Jerry Earl took a lot of people to the cleaners with his underhanded business tactics, so Carmela’s going to be hard-pressed to identify which of his enemies was steamed enough to kill him. As she sorts through Jerry Earl’s dirty laundry, she needs to collar the killer before another victim is set to tumble dry…"

Good stuff, right??  I must admit I'm a bookworm at heart.  I love books but here is the thing - once I start I either really get in to a book or I don't at all and toss it aside.  These scrapbooking mystery books are ones I CANNOT put down!!  I don't know how I was never aware of them to begin with but all I know is I'm hooked on the adventures of Carmela and Ava.

At the heart of this book is the mystery to be solved.  It will surely keep you on your toes as you try to put the pieces together along with Carmela and her best friend Ava.  One minute you think you have it all figured out and then the next something else pops up to change your mind and keep you turning pages.  Then there is the whole scrapbooking element.  Carmela is a scrapbooking shop owner and while she has become known for her murder mystery solving skills on the side she still has to work for living.  As a reader, you're invited in to her shop and see her work day unfold.  She holds classes, stocks inventory, shares tips, etc.  These tips are then passed on to the reader.  Carmela holds a passion for scrapbooking and papercrafting as much as we all do making her a character I could easily relate to and see myself going to if she owned a real shop.

So I have two signed copies of this book up for grabs.  If you'd like one of them just leave me a comment and I'll post winners on Monday to this thread.

Take care and have great days!!


Friday, December 13, 2013

Joy Tags - Tutorial

Its hard to believe we're already on major countdown to Christmas!!  I so love this time of year and have been delighting in less hustle, bustle and more peace, comfort, and joy.  Part of the fun for me is taking time to create some beautiful things to adorn presents.  


Tags are such a quick and easy way to do this and with the right string attached who knows they may just wind up on someones tree as a keepsake.  

Here is how you can recreate these cute little Joy tags to deck out your packages in style:

Step One: Cut watercolor paper down to tag size of choice (3x3 shown).  Ink up stamp (ScrapFX Moroccan Tile - 2013351) with VersaMark, sprinkle with embossing powder, and heat set.


Step Two: Spray background generously with mist.  Allow this to dry for a couple seconds then use a baby wipe to pounce away color from embossed areas.


Step Three: Layer some stenciling (ScrapFX Random Dots 2013172 used above) over the embossed background in the upper left and bottom right corners using paste.  Set this aside to dry completely. 


Step Four: Once paste is completely dry, highlight some circles using NeoColors or whatever coloring medium you have on hand.  Sprinkle some gold splats of mist across the tag.  *My apologies for not having a picture of these materials in this step.

Add some washi tape across a strip of burlap and adhere this piece diagonally across the tag.  I used fabric glue to ensure it would stick and hold up to being jostled around.


Step Five: Add some modeling paste to a Mini Christmas Tree (2007384) and set aside to dry.  Diecut some letters (or use stickers/chippies/etc.) in black and outline them with a white gel pen.  Adhere the letters 'J' and 'Y' to your washi tape strip.  Brush green mist onto dry tree and adhere to the washi tape strip in place of the letter 'O'.


Step Six: Outline tag with a black pen and add some random dash lines along the edges.


Step Seven: Cut patterned paper to 3x3 (or whatever size you have made you tag).  Stamp a to/from image onto the paper. No worries if you don't have one - just doodle it.  Sprinkle some splats of gold mist across paper.  Outline paper with a black pen and add some little dash lines along the edges.  Adhere this piece to the back of your tag.

*Note I didn't add the patterned paper prior to doing the messy work in order to keep the patterned paper clean from oozes and to cover up anything that may have leaked on back.


Step Eight: Punch a hole in the upper right corner of tag.  Add twine to create a loop and tie.  Your tag is now ready for gifting!

Here is a look at the front:


The back:


And a different angle to check out the fun texture created in some quick and easy steps:


I hope this quickie tutorial inspires you to gear up for some do-it-yourself wrapping worthy of being hung on a tree after.

Thanks for stopping by today.  Have great starts to the weekend and
Take care.


Tuesday, December 3, 2013

Skissedilla 230 - A Dad and His Girl

Its a new month and that means a new sketch up at Skissedilla for December.  This month the lovely Laetitia gave us a cool sketch to use, check it out:
Really rather cool and funky, right?
I wasn't quite sure what I'd do with my take at first but once I slapped some paste down through my new Circles and Squares ScrapFX stencil and had my picture it all just kind of came together through some picking over of bits my stash.  


I've been waiting to scrap this photo for a couple years now and I'm so glad its finally done.  This ScrapFX wordlet was perfect for it and adding some Amy Tangerine vellum stickers as a subtitle was a fun addition to lead in to some simple and quick journaling about the day. 

I do hope you take a quick time out from your festivities this month and join us at Skissedilla to play along with the sketch.  You could get some of those Christmas past memories scrapped while you're feeling festive or get a jump start on the present ones being captured - or like me just scrap the everyday.  Regardless I'd love to see you there!!


Thursday, November 21, 2013

Tutorial for Thursday - Project Life Insert Card

One of my favorite things about Project Life is how you can truly customize it.  I've been getting more and more in to this aspect as I've plugged along and ScrapFX has really helped my journey with all the fabulous mini chippies they've come out with, their fun stencils and stamps, and the best part - the offering of super durable project life size cards that hold up to mediums fantabulously!!


This is the insert I'll be showing you how to create today.  I was prompted to create this after seeing the wonderful shots of my son from his senior photo session.  We have so many great photos I know I'll be adding some to my album and I want to be prepared with some inserts for when I do!  Of course this can really be suited for so many things though, don't you think?  Lets get started.
 
 
Step One: Begin by covering the Kraft Card, large (2013335 KL) with gesso.  Once that is dry completely, color the card with mists.  I used two colors and added some water to allow for the colors to run and blend a bit.  Note: If you are going to use water to blend colors make sure they will not turn in to a muddy mess.  For this background I wasn’t overly concerned with darker colors occurring as I wanted a grungy look, but for other projects I’d take a bit more caution. 
 
Set this aside to dry or you can use your heat gun. Note: If you use your heat gun, some warping of the card will occur.  It can be straightened out but less will happen if you let it air dry.
 
 
Step Two: Take a background stamp and randomly apply it to the dried background.  Use your judgement on what looks good and try to create some balance to this.  You don’t want to over do it though, leave some space open.
 
 
Step Three: Use some gesso and water on your fingertip to lighten up the area you are going to get ready to stamp on.  Do this by gently smudging the gesso around.  It will pick up the colors of mist and create the smoky effect you see underneath the stamped area in the above image.

Ink up the Cogs Stamp (2013284) with VersaMark ink and stamp in across the corner of the card.  Pour gold embossing powder over it.  Heat set.  Note: Don’t be bothered if some embossing powder gets on other areas of the card.  This will only add to the texture and grungy overall look.
 
 
Step Four: Apply Rub n’ Buff over the stamped area to tone down the brightness of the embossing and give it a more aged, grungy look.  If you don’t have Rub n’ Buff you could use inks.  Apply this randomly on a few other sections of the card also.
 
 
Step Five:  Color cheesecloth (you can use gauze) with some mist and apply to card.  Alter up a Vintage Plane (2013288) by outlining it with pen and adding some Distress Stickles to it.  Adhere over top of cheesecloth with twine underneath.  Draw a line of glue in pattern you desire twine to be in.  Adhere twine to glue line. Add text and outline with a pen.

This card would look great as is in a journal, as the cover of a mini, or just by itself as a tag of sorts don’t you think?

Here are a couple pages from my album where I've created custom inserts or portions of pockets to make my PL album more my own.  Like I've said in the past I love what I see in kits but I don't really have the budget to get in to them.  I have bought some actual journal inserts and what not, but I find myself reaching for them more for my cards and LOs than for my PL album.  


 Here you can see one of the inserts actually looks somewhat similar to the one created above.  Its so simple to use quick techniques and make something that looks unique, not to mention it matched my photo. ;)


Here the long portion of the insert was created by me.  I used stencils, paste, misting, NeoColors, and then added embellishments and a stamped sentiment over the top.  The photos were spruced up with phone apps and then printed out - such fun this adds I think.  

Stay tuned to the ScrapFX toward the end of the month where I'll be sharing my PL type take on a December album and how I'm gearing up!!  I will make it this year since I'm actually planning - ha! I'm also looking forward to the New Year and starting a 2014 book - what about you??  Any plans to join in this year?


Sunday, November 10, 2013

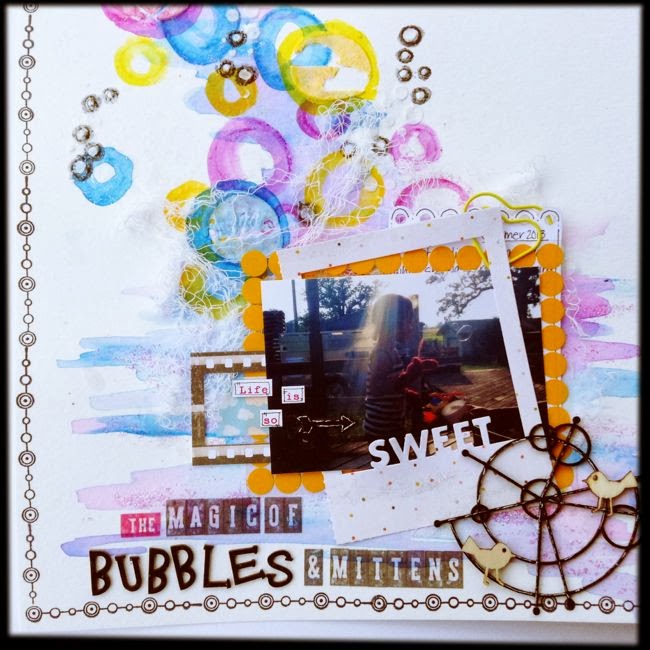
The Magic of Bubbles - Skissedilla #229

Hello There!  It has been a flurry of activity around my house as I prepared, set up, and participated in the first of a few markets for the season yesterday.  It was a blast as I had my baby girl with me helping and I'll be sure to share photos soon.  

In the meantime there is a new sketch out at Skissedilla for you to play along with during the month of November:


The lovely Brit created this one and you have oodles of time to join on in with the new adjustments to our posting - one sketch per month now instead of weekly sketches.

My page started off looking like this:


I had a vision of where I was going to go with my page and began playing with some watercolors along with my NeoColors.  I'm really smitten with circles these days in my projects.  I've always had a thing for them when I doodled and that dates back to when I was a youngster in school - zentangles of circles could be found all over my notes. ;)


I continued to layer up the circles using a variety of stencils to help out this time.  I used a few bits from the Studio Calico Sundrifter Mask and then of course I had to use my all time favorite stencil now - Random Dots from ScrapFX.  Each of these were used with some modeling paste and once dried they were highlighted with different mediums - the Sundrifter circles with more NeoColors to blend in and certain Random Dots with a Stabilo pencil.


With some very simple layers, ScrapFX chipboard, a couple wood veneers, letter stickers, and some stamping my final page came together quite quickly.  I really wanted to create a string of bubbles that seemingly continued on from the ones my niece was blowing in the picture.  Since the picture is more of a silhouette I didn't want too much going on around it - the background was busy enough - and so simple layering with the cheesecloth under seemed to work best. 


As you can tell I continued the circle theme throughout the entire page by using a Hambly transparency with circles, a graphic chippie from ScrapFX with circular elements, and of course the stamping is all about the circles.  I worried it might be overkill but in the end I liked the flow it created.  The chippie here was altered up with some black paint, decked out with a little touch of sparkle, and then highlighted with just hints of white gel pen. The words and letters are from Cosmo Cricket, Amy Tangerine, and ScrapFX.  I love, love the new vellum letters/words from Amy Tangerine - wish I would have picked up two packs of each!!

So there you have it the Magic of Bubbles and Mittens because yes my niece is in fact wearing mittens while she is blowing bubbles in the middle of some of the hottest days we had this past summer - that is just how she rolls - ha!  She found them on the porch from when I'd been pulling weeds since I couldn't find my proper gloves to do it with and thought they'd be the perfect addition to blow bubbles with - I think so too!!

I do hope you join us over at Skissedilla - check out what the other DT have been up to and we have a magnificent Selected Scrapper joining us this month as well!!

Take good care and enjoy your Sunday!


Friday, November 1, 2013

Mood Board Challenge ScrapFX - Spread Your Wings & Fly Mini Canvas

Happy Friday and November Sweetie Peeps!  Its been a bustling flow of craft activity around my house as I prepare for an upcoming Christmas market.  I've been having oodles of fun creating little delights I hope others will find joy in.  In the meantime though there has also been a wonderful flow of activity on the ScrapFX blog and YOU have the chance to get involved!


From now until Nov. 15 the above Moodboard is being used as inspiration for our current Fan challenge.  All you have to do is create a project based on it and you'll be entered in the running for some ScrapFX goodies and a Guest Spot on the blog.  Of course there is a slight twist - I mean what is a challenge without a little twist, right?


This sketch must also be used in the creation of your project.  Isn't it a fantabulous sketch?  You can use it as a launching pad for your design or follow it straight away - just as long as you share how you used it.  And before you ask, you don't have to use ScrapFX goodies in the creation of your projects.  We understand it may be tough yet for our fans to get their hands on the goods, so create away with what you do have and best of luck!!
 
Now for my 2nd project this month using this board.  I already posted my first here.
 
 
 I went with a cutie lil' mini canvas this time around.  I was highly inspired by the colors of the board and all the textures of the fabrics and the nest.  I also pulled a bit of inspiration for the background from the organic patterns found on those fabrics.  I did indeed use the sketch for my design but in this case I used it as more of a launching pad since my canvas was so small.  I pulled certain elements from the sketch and translated them to where the main items I used on the canvas would be placed.   
 
The background is made up of paint, mist rubbed on, stamping, stenciling with some paste and my fav ScrapFX stencil (Random Dots), a bit of pastels for highlighting certain circles, and gold mica flakes.
 
 
 I left the butterfly bare since there was so much color going on everywhere else and just coated it with some glitter glue.  When the glitter glue was added it actually deepened the color of the bare chipboard a tad and I really like the effect it gave.  The words were painted with some acrylic paint and highlighted with a white pen.  Doilies, sequins, and a rhinestone flower finished everything off.
 
This piece came together really quickly with the longest part being the dry time for the gold mica flakes - which actually don't take too long in the grand scheme of dry times - and yet it packs a punch.  Power to the mini canvases!!  So glad I have a bunch of these stashed away - can't wait to play some more with them.  What do you have stashed away that could be a hidden gem to play with this weekend?  Perhaps you could use it for your entry in to the challenge at ScrapFX.  Hope to see you there!!