Showing posts with label watercolors. Show all posts

Tuesday, February 11, 2014

ScrapFX Sneaky Peeks

I'm up on the ScrapFX blog and the new release of beach theme items made me oh so happy!  Not only are the chippies, stamps, and stencils super magnificent - it also gave me yet another reason to warm things up around here even if its only in my creative thoughts.


I had a glorious time playing with my watercolors, ScrapFX Wave Border (2007168) chippie, and Random Dot Stencil (2013172) to create a nautical background.  Then layered up some new and old beach themed chipboard to embellish the page.  I just lurve all the new coral pieces to bits!!!


During December and January we had freestyle months on the blog so the Steampunk release of chippies kind of got overlooked.  I've been smitten with this Headgear Lady (2013377) and Chickenwire Heart (2013375) since I received them so I thought why not try and mix them up with a beach item and showcase both?  I succeeded in my venture as the branch like piece on this canvas is actually meant to be coral - I love when stuff can be dual purpose don't you?

If you'd like to see the full reveal of these projects, and I'd love for you to go check them out, you can click here.

Thanks so much for stopping by today!

Thursday, November 21, 2013

Tutorial for Thursday - Project Life Insert Card

One of my favorite things about Project Life is how you can truly customize it.  I've been getting more and more in to this aspect as I've plugged along and ScrapFX has really helped my journey with all the fabulous mini chippies they've come out with, their fun stencils and stamps, and the best part - the offering of super durable project life size cards that hold up to mediums fantabulously!!


This is the insert I'll be showing you how to create today.  I was prompted to create this after seeing the wonderful shots of my son from his senior photo session.  We have so many great photos I know I'll be adding some to my album and I want to be prepared with some inserts for when I do!  Of course this can really be suited for so many things though, don't you think?  Lets get started.
 
 
Step One: Begin by covering the Kraft Card, large (2013335 KL) with gesso.  Once that is dry completely, color the card with mists.  I used two colors and added some water to allow for the colors to run and blend a bit.  Note: If you are going to use water to blend colors make sure they will not turn in to a muddy mess.  For this background I wasn’t overly concerned with darker colors occurring as I wanted a grungy look, but for other projects I’d take a bit more caution. 
 
Set this aside to dry or you can use your heat gun. Note: If you use your heat gun, some warping of the card will occur.  It can be straightened out but less will happen if you let it air dry.
 
 
Step Two: Take a background stamp and randomly apply it to the dried background.  Use your judgement on what looks good and try to create some balance to this.  You don’t want to over do it though, leave some space open.
 
 
Step Three: Use some gesso and water on your fingertip to lighten up the area you are going to get ready to stamp on.  Do this by gently smudging the gesso around.  It will pick up the colors of mist and create the smoky effect you see underneath the stamped area in the above image.

Ink up the Cogs Stamp (2013284) with VersaMark ink and stamp in across the corner of the card.  Pour gold embossing powder over it.  Heat set.  Note: Don’t be bothered if some embossing powder gets on other areas of the card.  This will only add to the texture and grungy overall look.
 
 
Step Four: Apply Rub n’ Buff over the stamped area to tone down the brightness of the embossing and give it a more aged, grungy look.  If you don’t have Rub n’ Buff you could use inks.  Apply this randomly on a few other sections of the card also.
 
 
Step Five:  Color cheesecloth (you can use gauze) with some mist and apply to card.  Alter up a Vintage Plane (2013288) by outlining it with pen and adding some Distress Stickles to it.  Adhere over top of cheesecloth with twine underneath.  Draw a line of glue in pattern you desire twine to be in.  Adhere twine to glue line. Add text and outline with a pen.

This card would look great as is in a journal, as the cover of a mini, or just by itself as a tag of sorts don’t you think?

Here are a couple pages from my album where I've created custom inserts or portions of pockets to make my PL album more my own.  Like I've said in the past I love what I see in kits but I don't really have the budget to get in to them.  I have bought some actual journal inserts and what not, but I find myself reaching for them more for my cards and LOs than for my PL album.  


 Here you can see one of the inserts actually looks somewhat similar to the one created above.  Its so simple to use quick techniques and make something that looks unique, not to mention it matched my photo. ;)


Here the long portion of the insert was created by me.  I used stencils, paste, misting, NeoColors, and then added embellishments and a stamped sentiment over the top.  The photos were spruced up with phone apps and then printed out - such fun this adds I think.  

Stay tuned to the ScrapFX toward the end of the month where I'll be sharing my PL type take on a December album and how I'm gearing up!!  I will make it this year since I'm actually planning - ha! I'm also looking forward to the New Year and starting a 2014 book - what about you??  Any plans to join in this year?


Tuesday, November 19, 2013

A Work in Progress Canvas & a New ScrapFX Challenge for You!

Its been a lot of fun (and work ;) ) creating things I hope people will find delight in looking at and perhaps purchasing for market.  The super thing is I can do this while knocking out some assignments at the same time - bonus!!


This month we have another Mood Board Challenge going at ScrapFX for fans to join in on.  There isn't a need to have ScrapFX product to participate - super cool if you do though!!  The Designers all partake in the challenge as well and post their take on the board as well as the twist given by the board creator - gotta have a twist to make it more interesting, right?  This month's twist is to use stencils, easy peasy except there are so many splendid ScrapFX stencils its hard to narrow down which to choose. 


For my take I was inspired by the rainbow colors, of course, I mean how could I not be??!!  This blog oozes color - ha!  Then I was also inspired by the eye on the board and that spun in to the creation of the girlie on this canvas - from there I let my imagination go wild giving her a little scene.   Since I don't live near the ocean, like the board image shows I went with the country life instead. :D

* I will share this piece isn't fully finished.  Its about 95% done and there are still some finishing details I want to fuss around with to complete it.  Not wanting to force and be unhappy with the finished result I left it as it was for now and will have it complete by the end of the month when I post my personal reveal.


I created my girlie's afro by using the ScrapFX Cogs Stamp with some colored heavy gesso and stamping it onto the canvas.  I then went back in with watercolor once this was completely dry to fill in the rest of the color.  In the background I used the Random Dots stencil to give the sky some texture and I went around the girl's head with some glitter glue to help it stand out against it.  I wish this showed up better....arrrgghh!!


Here you can see the Crosswords Stencil in action.  This was the first time I'd used it and I really am diggin' the effect it gave and the ease of use - I thought perhaps I'd have a struggle controlling where I put the paste, but nope.  Maybe my circle obsession will be shared with squares now - teehee!!  I adore those little chippie apples and kind of wish they were sold on their own....hmmm... maybe I shall suggest that. Some stamping and lots of paint layers make up the grassy areas along with some pen work.  

And that is where I've left off.  Still not exactly sure what details I'm going to add but have been playing with a few things here and there.  Any suggestions of what you think miht just absolutely make this?  I'm thinking I may want to add text or a quote or a ScrapFX wordlet - just can't decide what will fit yet.  The grassy areas need to be broken up more......sky too..... so holla' if you have ideas I'd love to hear them.  :)  I'd also love to see you playing along with the challenge!!!  This is the last one we'll be having for a couple months as we head in to the Christmas and holiday season so get in while you can for your chance to win some great goodies!!!

Until next time, take good care and thanks so much for stopping by!

Sunday, November 10, 2013

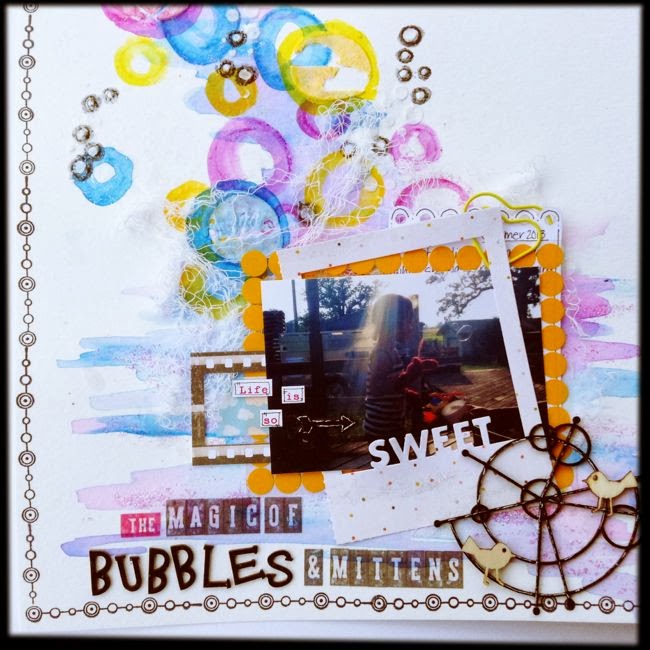
The Magic of Bubbles - Skissedilla #229

Hello There!  It has been a flurry of activity around my house as I prepared, set up, and participated in the first of a few markets for the season yesterday.  It was a blast as I had my baby girl with me helping and I'll be sure to share photos soon.  

In the meantime there is a new sketch out at Skissedilla for you to play along with during the month of November:


The lovely Brit created this one and you have oodles of time to join on in with the new adjustments to our posting - one sketch per month now instead of weekly sketches.

My page started off looking like this:


I had a vision of where I was going to go with my page and began playing with some watercolors along with my NeoColors.  I'm really smitten with circles these days in my projects.  I've always had a thing for them when I doodled and that dates back to when I was a youngster in school - zentangles of circles could be found all over my notes. ;)


I continued to layer up the circles using a variety of stencils to help out this time.  I used a few bits from the Studio Calico Sundrifter Mask and then of course I had to use my all time favorite stencil now - Random Dots from ScrapFX.  Each of these were used with some modeling paste and once dried they were highlighted with different mediums - the Sundrifter circles with more NeoColors to blend in and certain Random Dots with a Stabilo pencil.


With some very simple layers, ScrapFX chipboard, a couple wood veneers, letter stickers, and some stamping my final page came together quite quickly.  I really wanted to create a string of bubbles that seemingly continued on from the ones my niece was blowing in the picture.  Since the picture is more of a silhouette I didn't want too much going on around it - the background was busy enough - and so simple layering with the cheesecloth under seemed to work best. 


As you can tell I continued the circle theme throughout the entire page by using a Hambly transparency with circles, a graphic chippie from ScrapFX with circular elements, and of course the stamping is all about the circles.  I worried it might be overkill but in the end I liked the flow it created.  The chippie here was altered up with some black paint, decked out with a little touch of sparkle, and then highlighted with just hints of white gel pen. The words and letters are from Cosmo Cricket, Amy Tangerine, and ScrapFX.  I love, love the new vellum letters/words from Amy Tangerine - wish I would have picked up two packs of each!!

So there you have it the Magic of Bubbles and Mittens because yes my niece is in fact wearing mittens while she is blowing bubbles in the middle of some of the hottest days we had this past summer - that is just how she rolls - ha!  She found them on the porch from when I'd been pulling weeds since I couldn't find my proper gloves to do it with and thought they'd be the perfect addition to blow bubbles with - I think so too!!

I do hope you join us over at Skissedilla - check out what the other DT have been up to and we have a magnificent Selected Scrapper joining us this month as well!!

Take good care and enjoy your Sunday!


Tuesday, October 22, 2013

Thankful for You

Hello!  Stopping in quick to share the first of a few cards I'm making for my daughter's softball team fundraiser basket.  They are having a raffle coming up soon and her team was assigned the basket for cooking.  To say we weren't exactly excited in understatement considering some of the other team's basket topics, but we're making the best of it!


One other mom and I decided to take over being in charge of the task and while brainstorming how to approach it I thought of the idea of making our basket Thanksgiving themed since the fundraiser will happen in the beginning of November.  My contribution will be some handmade cards and hopefully a canvas as well.  We shall see how well and quickly the creative juices flow. ;)


 This is the first card I've created and I'm pretty sure I'll be sticking with a design similar to this for at least a few more.  Not sure how many total I'll make yet.  I used a ScrapFX leaf chippie that I altered with my String Gel technique and added it on top of a watercolored base that has a bit of stenciling done with some paste.  The rest is just layers of textiles, embellishments, and paper along with a stamped sentiment.  This came together rather quickly and so I'm totally digging that.  Plus I think having something crafty in our basket will add a unique touch which I hope will draw peeps to wanting to place their tickets in the raffle for it.

Well wish me luck on creating some more and I'm thankful for you, my sweet readers for stopping by to this.  Take care!


Monday, October 7, 2013

Seize the Day - Skissedilla #228

Happy Monday Peeps!  Its a new week, new month, and there is a new sketch up at Skissedilla along with some new changes.  


Instead of having weekly sketches posted to the blog there will now be just one monthly sketch with the entire DT posting inspiration for that sketch. That is a heap of eye candy!!  Of course there will still be a selected scrapper, this month the we have the spectacular Michelle of My Analog Life joining us - Yahoo!!  The blog will be written in both Norwegian and English - so excited about this since I've been working on my Norwegian since I first joined the team - and we do hope this will help more scrappers from around the globe play along with us regularly! Now on to my take for October :D

I couldn't wait to get going with this sketch.  I had all sorts of ideas and when it came down to it - I did none of the ones I had in my head - ha! Crazy.  I wanted to do something different and just started playing with my background.  Lots of watercolor, acrylic paint, paste, and NeoColors II were combined to get this look along with my current fav ScrapFX stencil - Random Dots.


I knew I really didn't need a lot of extras/embellishmets for this page and I started by adding the hot air balloon sticker.  From there I busted out the sequins which you can obviously tell I had fun with, LOL.  My daughter even helped out by digging for gold in a huge bucket-o-sequins I have.  Then I added in some cheesecloth under the photo to soften the background a bit and draw more attention to the photo.  


To finish off the page I stamped some leaves with metallic paint using the ScrapFX Leafy Stem Stamp on some text patterned paper, outlined, cut them out, and tucked them under the photo.  The ScrapFX wordlet title was colored with NeoColor in red to bring that back out and match the balloon up top, stamped randomly, highlighted with a white gel pen, and adhered to the page to complete it. 

Now its time for you to head on over to the Skissedilla blog to check out the rest of the inspiration waiting there for you - oh goodness it will blow you away - so fortunate am I to scrap with such an amazing group of ladies, love them to bits. I do hope to see you join on in with the sketch challenge too!  You have the entire month of October to play along so plenty of time to get that mojo flowin' and page pumped out! 

Have a super start week and take good care! 

Friday, September 27, 2013

Project Life Inserts

Happy Friday Peeps!  Its been a bit since I've shared any Project Life haps here since I took a kind of hiatus from blogging over the summer.  Life still happens though - funny how that works huh?  I've kept on and my album and ways of doing things is ever evolving.

Card created using ScrapFX Seed Stem and Field of Flowers stamps
 In this post I shared a bunch of sneaks of projects relating to my recent obsession with stamping and need for finding making time to create everyday.  A lot of them were actually bits from Project Life inserts I created.  You see I've found what actually makes me the happiest about Project Life is truly bringing my own art/spin to it and treating it more as an art journal of sorts.
 
ScrapFX Feather Stamp
 
Not only do I get to have a customized look by doing this, but I find that the quotes, imagery, and colors are all more suited for what I want to express.  Rather than trying to fit my family in to a kit, I'm creating a kit that fits my family and there is truly something magical about that! 

Card created using ScrapFX Feather Stamp and Random Dots Stencil
Plus there is the added bonus of artful play time!  I get to take 15-20 minutes and play with goops to create some inserts I think will suit photos I know I've taken - and yes I admit not all the inserts I create are made with certain shots in mind and that is okay too.  I have fun creating them and know that at some point I'm sure I'll use them - if not well at least I created art I enjoy for the day.  The main thing here is I'm doing something I feel is meaningful and that is what I want my album to really express - meaning.  I want the stories to be told through my pictures, journaling, and I want the 'filler' cards to be meaningful little expressions created by me too.  

I'm not saying I won't ever use a store bought journal cards intended for Project Life - I have indeed purchased some - for now though they have found life on regular cards and I love the addition they add there.  I'm not knocking on people who use them either because I adore a lot of various Project Lifers styles out there believe that!  This is just me sharing what works for me and makes me happy. 
 
To see some pages I actually photoed of September haps around here you can head on over to ScrapFX here where myself and fellow DT member Michelle have some pages posted.
 
If you're doing the Project Life thing I'd love for you to leave me a link so I can check out how you do your thing - like I said I admire and enjoy anyone takes on this task.  Its a true labor of love.
 
Until next time, take good care!!  
 

Wednesday, September 25, 2013

Getting Pinned - Skissedilla #226

Hi There!  Its a new week and that means a new sketch is up at Skissedilla for you to play along with.  This week the lovely Nabon created this beauty for us to work with:


Totally gorgeous, right?  I sat and looked at it for a bit wondering what to do.  I'm not necessarily a flower gal, but I'm warming up to them I must say.  I also have some amazing dies in my stash that could surely use a workout so I figured why not play up the flower angle a little since I had the perfect pictures for it.


 This series of photos of my son 'getting pinned' with his flower before the Snowball Dance (the one where the girl asks the guy) seemed very fitting for a flowery type LO.  Not that I went overboard with heaps of flowers but for me having any type of flower cluster be the main embellishment is huge LOL!  I must say though I had a ton of fun playing with my flower dies again and I need to make some time to just sit and create some flowers so I have them available.  Much more practical then doing it LO by LO.


 Here you can see the background texture and lots of the details in general better.  I used acrylic paints and watercolors to create the various blue tones and then went over that with a Ronda Palazzari Designs stencil and some paste.  This same stenciled design is used in the corners of the LO also.  I brought in the pinks and greens by using some glitter glue and my finger and added some confetti bits and gems.  The chipboard piece was dry embossed, coated sparsely with gesso, and then highlighted with some gold, and outlined.


The dies I used are from My Favorite Things, chipboard is ScrapFX, and the leaves are made from a hand carved stamp and some paint.  The lines that are highlighted in black would be negatives when stamped but the paint smooshed a bit so I highlighted. ;) 

To share the back story on these photos before I go - starting at the top is my son and his date.  She was trying so hard to get the flower on him without poking him and to have it look nice - didn't work.  Then I tried to get the flower on him.  I didn't worry so much about poking him, I just wanted the thing on him.  I got it but it wouldn't stand up straight.  Next his date's mom tried - that is the photo with the doodled border around it.  She couldn't get it either!  Finally one of his buddies came over and said I can do this.  I was all thinking in my head - yeah right - but by golly he did it!  No poking of the skin, the flower stood up straight, and looked great.  Who would've thought.  We all had a good laugh over it and then declared the next time the better option would be a magnet attachment - did you know they make those now??!  Totally cool and much easier - ha!

Well thanks for letting me share that little story, ahh the joys of high school right? I do hope you join us at Skissedilla this week.

Take good care!  


Wednesday, September 18, 2013

Smitten with Stamping

Hi Sweetie Peeps!  Hope this middle of the week is bringing you joy.  In my world we're experiencing chilly temps, bouts of sunshine in between some cloudy days, and pretty much falling back in to the schedule of school/sports/etc..  There is much work to do getting stuff done around here but I was inspired by Ronda Palazzari, through Instagram, and by the new release of foam stamps by ScrapFX to make time for myself and create something every day.


As this close up says - do something.... no matter how much or how little.  Just do something.  It isn't easy to get in this habit but I'm trying my best.  I can think of a zillion other things I could/should be doing but when it comes down to it after I create I'm a better person.  I'm calmer, more grounded, and ready to tackle those zillion things.  So I guess I'm taking the time to say I'm worth it and allowing myself the sanity.  What about you?  Have you noticed this about yourself after creating?  Do you think you're worth it?  I do.  The housework will always be there, but your state of mind and being is something to care for peeps.  Real talk. 
 
 
Some days I just play and art journal.  These are the new foam ScrapFX Feather Stamps - can we say smitten?  I think so.  All I did on this day was stamp, stamp, and prep a journal background.  No clue what I was going to do - just playing - and it was FUN! 


And from my playtime spurs ideas - this is what I'm finding so neat - because I'm not pushing myself so hard to come up with the next big thing my brain is freely open.  I'll be honest in sharing its been a bit since I've felt this loose and carefree in my creating.  Its easy to get caught up in what might be eye catching and I felt like I was losing myself - it was almost uncomfortable to create - a struggle!  Am I the only one who has felt this?


You cannot grow without practicing.  Some things will turn out lovely, others not so much, but practicing is key to growth - making time for that practice beyond the DT pages, or challenge entries, or, or, or is even more key.  I've A LOT of disasters in a baggie that I use to hack up in to bits - haha - they are hideous as whole pieces but sometimes when cut down, punched out, they can work. ;)
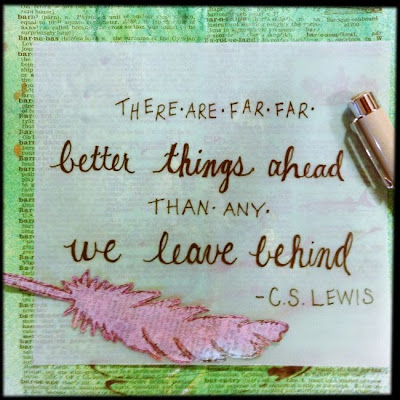

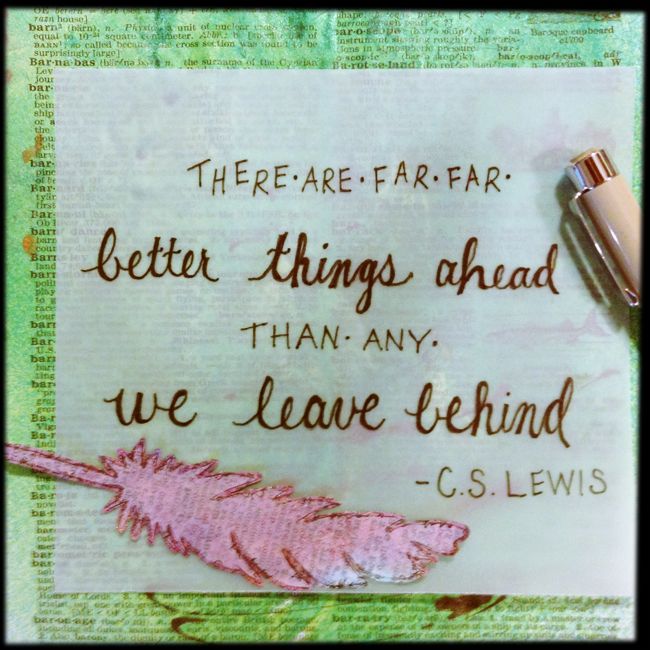
A huge thing I desire to grow in and am practicing is my lettering.  I adore letters, being a former early childhood teacher and all how could I not, right? and my printing is something I'm proud of.  I worked on perfecting it for years, thanks to my third grade teacher who had the best printing eva'!!  Shout out to Mrs. Vinton wherever you are, thank you for instilling the love of outstanding printing in me.  But when it comes to other fonts and such I lack.  So I bought the book Creative Lettering - it is marvelous - and I dove in to practice.  This piece is totally inspired by Lori Vliegen of Elvie Studio.  I've longed admired her lettering and work so it was a natural draw to try my hand at her way of doing things.  I know as I go along I'll gain more of my own style and spin on things but for now I practice.  What are you wanting to learn/practicing?


Whatever it may be I say let go of your fears & soar!  You have nothing to lose but everything to gain!!

And that my dear readers is my post for you today.  Some of the above closeups are up in full on the ScrapFX blog right now and if you'd like to see them I'd love to have you visit and let me know what you think.

Thanks so very much for stopping by today, take good care!

Monday, September 9, 2013

A Beautiful Mess - Skissedilla #224

Hello, hello!  Happy Monday to you!  Its that time of week when Skissedilla has just put out a new sketch for you to join us in playing along with.  I've been dying to share my page because I was so thankful to finally have some LO mojo back!!  Do you ever get in those slumps?  Where it just seems like no matter what you put together it just doesn't seem to flow right?  Yeah I was there.  Anyhoo, the following sketch helped me get over the hump - YAY!


The lovely Linda created this sketch and whether you're in need of getting over a scrappy slump like I was or just love to use sketches as your starting point ( this is me too!  love me some Skissedilla sketches :D ) I do hope you take some time to hop on over, be inspired by the fantabulous creations from the other DT gals, and join on in!

My page started with some background play to create a rainy day effect.  I had some fun with mists and watercolors over the top of the stenciling I did with my ScrapFX Clouds and Raindrops stencil (after it dried completely - ahh the agony of waiting!).  In my head I had envisioned something bolder turning out but in the end I really like how subtle the effects actually are.  Up close and personal they are a tad more vibrant.


This is the entire top portion of the 'rainy' background.


I then moved on to playing with the new ScrapFX stamps!!  Oh me, oh my they are fantabulous.  More on this soon as I have my reveal coming up for this release, but gosh I'm having a ton of fun with these.  I used a variety of mediums to stamp and emboss with and varied the materials I stamped on also to create a little scene.  What I love is this is very much what the fields around our house look like!
Finally all of it came together with my picture and some paper layers, my ScrapFX chippies, and some additional embellishments to create my page - A Beautiful Mess.  Indeed she was - LOL.  After so many rainy days here throughout June our fields were flooded badly.  My baby girl decided when it was finally a clear day she'd go exploring and check them out.  Well when she walked out in what she thought was a safe area she discovered the mud wasn't so forgiving.  She got stuck and had to really work herself out of it and this is what she came back looking like! O.o  Totally funny.

So there you have it - after the rain, comes a beautiful mess so always weather the storm. 

Have a really terrific Monday friends!

Wednesday, July 3, 2013

2 Lil' Bums - Skissedilla #217

Hey, Hey!!  Its Wednesday and there is a fantabulous sketch up at Skissedilla for you to get your craft on with.  

 
I always dig the artsy feel of the sketches the talented Nabon.  She blows my mind!!!  Sometimes I think I could just hang them up as is - ha!


My take this week involved some play with: an older photo (ala 2006 from our FL trip) - 4x6 - gasp! (giggles), the Uncharted Waters line by Glitz Design (love), watercolors, Liquitex products - fluid ink & paste, sequins, new goodies from Paper Issues (oh yeah I hit up that 50% off sale!!), some other various texture items for layers, and of course my ScrapFX chippies and a new stencil was put to work to create those spectacular little dots!  This is what the stencil looks like:

Random Dots Stencil

Sorry for the blurry image - not sure what that is all about - but I wanted to show how fun this stencil is.  Perhaps I should have shot the actual stencil.  I love the freedom in this design and the actual stencil itself is really flexible so I was able to manipulate it all over my background to get just the portions I wanted.  Super important since I don't readily use a whole stencil much.

This is my full page reveal.  I had such a good time reminiscing while creating.  Hard to believe the kidlets in this photo are teens now! O.o  Up to this point I'd used some of my Uncharted Waters stash here and there, but this was the first real nautical page I'd created with it.....I can honestly say going in to this I didn't really care for anchors......coming out I am a bit more keen on them.  Don't think I'll be jumping all over them when I see them - just know I can use these papers better now! :D 

The background was super easily put together with my paste, watercolors, and I soo wish you could see the all the misting!!!!  I used my Tsukineko sprays - Goosebumps and Pssts!  to be exact and the texture and shimmer is out of this world!!  These are some of my favorite sprays eva'.  I may have to do a little tag or try again with a shot to help you see the awesomeness of these mists.  They're that good people!!! 

With that, I'll leave you for today and wish you a grand one!  Thanks for the well wishes on drying out - so far so good.  Today its supposed rain again.... the skies tell the tale it probably will.  We've been enjoying our days in the sun though and will get out and enjoy today as well ;)

Take care!!

Wednesday, June 6, 2012

Tag You're It!!

Hey Sweet Peeps!  It has been WAY too long since I've been here - my word its a new month and everything!!  Life has been crazy busy and adjusting to all that is going on has left me with little time to blog any haps!  Really need to change that - perhaps blogger mobile is in order??  Anyone use that to actually post blogs?  If you do do you like it?

So I totally loved the game of tag when I was kid - I was a little speed demon in torn tights and black patent leather shoes - oh yeah! Seriously hated those things - but I still do love a good game of tag - these days instead of running it involves all sorts of messy goodness on actual tags!

I was soo super excited to receive my package from Simon Says Stamp the other day because it contained some of the Dylusions Ink Sprays released this past CHA!!!  Eek, I've been wanting these for a LONG time, like since I saw Dyan Reaveley's blog.  I was very much attracted to her use of bright colors and wished she had more of her Dylusions line available in the States - wish come true and this tag shows off how awesome the colors are!!  The oranges and yellows are Dylusions complimented by some VersaColor ink.  I'll be posting some more detailed shots on my Instagram feed soon - I know I should know how to tell you where you can find it, but I don't, LOL!!  So your best bet would be to find me on FB.

When I get new supplies or I'm feeling stuck in a rut I turn to tags for playtime.  Anything goes.  If it works - great - if it turns in to a disaster - great.  I can still use my mistakes later to punch shapes from, cut strips for journaling, or cover it all up with gesso and really start over.

I went a little out of my comfort zone and ordered up the Dear Lizzy Neopolitan 6x6 pad.  The colors of the actual paper are a bit too light for my typical taste but I was smitten over the patterns.  So I decided I'd blend the patterns and colors I love to see what happened.  Taking on a suggestion from a dear friend at SNR I gave watercolors a go for a creative boost.  I dipped my brush in my watercolors (I use the Blick brand liquid watercolors and will never look back!) and then in a bit of PearlEx - oh my color me happy!!!!  I wish you could see the shimmer on this tag!!!  I will definitely be playing with this combo again.  I added gesso through some type of hardware tape.

I think for tonight I'm going to stick with my game of tag - there are plenty of challenges I want to play along and My Sketch World is having the all time member favorite ABC crop (you should go check it out, lots of fun!) - but I need some new techniques/ideas/muse/mojo/whatever you want to call it to meet those challenges.  I've been really comfortable for sometime and am itchin' for some new pick me ups.  I'll keep you posted on any fabulous findings.  

What have you been playing with lately technique or product wise??