Friday, September 27, 2013

Project Life Inserts

Happy Friday Peeps!  Its been a bit since I've shared any Project Life haps here since I took a kind of hiatus from blogging over the summer.  Life still happens though - funny how that works huh?  I've kept on and my album and ways of doing things is ever evolving.

Card created using ScrapFX Seed Stem and Field of Flowers stamps
 In this post I shared a bunch of sneaks of projects relating to my recent obsession with stamping and need for finding making time to create everyday.  A lot of them were actually bits from Project Life inserts I created.  You see I've found what actually makes me the happiest about Project Life is truly bringing my own art/spin to it and treating it more as an art journal of sorts.
 
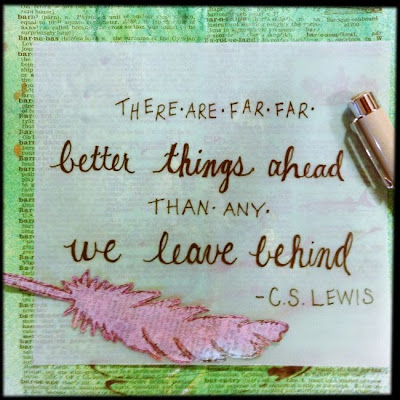
ScrapFX Feather Stamp
 
Not only do I get to have a customized look by doing this, but I find that the quotes, imagery, and colors are all more suited for what I want to express.  Rather than trying to fit my family in to a kit, I'm creating a kit that fits my family and there is truly something magical about that! 

Card created using ScrapFX Feather Stamp and Random Dots Stencil
Plus there is the added bonus of artful play time!  I get to take 15-20 minutes and play with goops to create some inserts I think will suit photos I know I've taken - and yes I admit not all the inserts I create are made with certain shots in mind and that is okay too.  I have fun creating them and know that at some point I'm sure I'll use them - if not well at least I created art I enjoy for the day.  The main thing here is I'm doing something I feel is meaningful and that is what I want my album to really express - meaning.  I want the stories to be told through my pictures, journaling, and I want the 'filler' cards to be meaningful little expressions created by me too.  

I'm not saying I won't ever use a store bought journal cards intended for Project Life - I have indeed purchased some - for now though they have found life on regular cards and I love the addition they add there.  I'm not knocking on people who use them either because I adore a lot of various Project Lifers styles out there believe that!  This is just me sharing what works for me and makes me happy. 
 
To see some pages I actually photoed of September haps around here you can head on over to ScrapFX here where myself and fellow DT member Michelle have some pages posted.
 
If you're doing the Project Life thing I'd love for you to leave me a link so I can check out how you do your thing - like I said I admire and enjoy anyone takes on this task.  Its a true labor of love.
 
Until next time, take good care!!  
 

Wednesday, September 25, 2013

Getting Pinned - Skissedilla #226

Hi There!  Its a new week and that means a new sketch is up at Skissedilla for you to play along with.  This week the lovely Nabon created this beauty for us to work with:


Totally gorgeous, right?  I sat and looked at it for a bit wondering what to do.  I'm not necessarily a flower gal, but I'm warming up to them I must say.  I also have some amazing dies in my stash that could surely use a workout so I figured why not play up the flower angle a little since I had the perfect pictures for it.


 This series of photos of my son 'getting pinned' with his flower before the Snowball Dance (the one where the girl asks the guy) seemed very fitting for a flowery type LO.  Not that I went overboard with heaps of flowers but for me having any type of flower cluster be the main embellishment is huge LOL!  I must say though I had a ton of fun playing with my flower dies again and I need to make some time to just sit and create some flowers so I have them available.  Much more practical then doing it LO by LO.


 Here you can see the background texture and lots of the details in general better.  I used acrylic paints and watercolors to create the various blue tones and then went over that with a Ronda Palazzari Designs stencil and some paste.  This same stenciled design is used in the corners of the LO also.  I brought in the pinks and greens by using some glitter glue and my finger and added some confetti bits and gems.  The chipboard piece was dry embossed, coated sparsely with gesso, and then highlighted with some gold, and outlined.


The dies I used are from My Favorite Things, chipboard is ScrapFX, and the leaves are made from a hand carved stamp and some paint.  The lines that are highlighted in black would be negatives when stamped but the paint smooshed a bit so I highlighted. ;) 

To share the back story on these photos before I go - starting at the top is my son and his date.  She was trying so hard to get the flower on him without poking him and to have it look nice - didn't work.  Then I tried to get the flower on him.  I didn't worry so much about poking him, I just wanted the thing on him.  I got it but it wouldn't stand up straight.  Next his date's mom tried - that is the photo with the doodled border around it.  She couldn't get it either!  Finally one of his buddies came over and said I can do this.  I was all thinking in my head - yeah right - but by golly he did it!  No poking of the skin, the flower stood up straight, and looked great.  Who would've thought.  We all had a good laugh over it and then declared the next time the better option would be a magnet attachment - did you know they make those now??!  Totally cool and much easier - ha!

Well thanks for letting me share that little story, ahh the joys of high school right? I do hope you join us at Skissedilla this week.

Take good care!  


Friday, September 20, 2013

More Fun with Stamping - A Mixed Media Birdhouse

Happy Friday Peeps!  I've continued on with my stamping frenzy and I must say I'm kind of hooked on these feather stamps from ScrapFX:


If you noticed in my last post I used them on just about every project.  I just can't get enough of them and have oodles of ideas flowing.  In keeping with my play/create everyday theme I decided I'd bust out some fabric and stamp on that.  


I have heaps of muslin cloth in my stash and that seemed like a great place to start.  I began by stiffening the fabric with some spray stiffener only I didn't spray it on I brushed it.  Once that was dry - yes I used my handy dandy heat gun to help it some ;) - I pondered how I was going to stamp on it.  My first thought was to use paint, but then I decided I'd try out embossing.  So I mixed up some Lindy's Magical Micas with clear embossing powder, sprinkled it on my VersaMark stamped image, and heated it up.


Booyah!  A beautiful fabric feather.  The material is super stiff now and ready for whatever my heart desires to do with it.  It also blended right into the fabric making it appear as though it actually was printed on it - kind of neat effect I think.  


I played on and made some glittery feathers too!  These were stamped on the stiffened fabric (I stiffened a bunch right away so I could play a lot) with gel medium on fabric and while the medium was still wet I sprinkled it with glitter.  I set them aside to dry and after what you see above is what I got.  I must say it was a little tricky to stamp with the gel.  Definitely had to do a couple test runs to get the image to come out right.

So now what to do with these pretties?? 


One with a little birdie in a bucket and some other little tidbits is rather cute.  The stiffened fabric really worked to my advantage here allowing the feather to stand up nice and tall on its own.


A cluster of two more looks pretty along with a ScrapFX chipboard flourish and some of the floral pieces I had in my stash from when I got ambitious and thought I'd go on a wreath making frenzy a while back - yeah didn't happen, but hey at least the items were on clearance - ha!


All coming together to create a whimsical mixed media altered birdhouse.  Typically I'm not a birdhouse altering person but I had this in my stash (I actually have a lot of these wooden type things in my stash) and felt inspired to give it some life by the current Moodboard Challenge up on the ScrapFX blog.  Do take some time to check it out and join us in playing along!


I used Liquitex Coarse Texture paste on the base, after it was primed with gesso (white), and then coated it with a variety of paints - both store bought and self mixed with Lindy's Magical Micas.  Then it went back and highlighted the areas I wanted black with some more paint.  This took patience I tell you what.  After it was dry I went in with my white pen and added the doodles and started attaching all my embellishments.  Oh and the roof!  The roof is done with burlap, some glitter, and gold mica flakes.  All sides are altered with paint the same as the front.

Since I stamped on some fabric I'm going to link this up to Simon Says Stamp's Monday Challenge Blog where the current challenge is to stamp on something other than paper or cardstock - check!

Thanks for joining me on this adventure today.  Don't forget to head on over to ScrapFX, check out the Moodboard and what my fellow DT members made, and play along for your chance to win a guesting spot!!

Take good care!

Wednesday, September 18, 2013

Smitten with Stamping

Hi Sweetie Peeps!  Hope this middle of the week is bringing you joy.  In my world we're experiencing chilly temps, bouts of sunshine in between some cloudy days, and pretty much falling back in to the schedule of school/sports/etc..  There is much work to do getting stuff done around here but I was inspired by Ronda Palazzari, through Instagram, and by the new release of foam stamps by ScrapFX to make time for myself and create something every day.


As this close up says - do something.... no matter how much or how little.  Just do something.  It isn't easy to get in this habit but I'm trying my best.  I can think of a zillion other things I could/should be doing but when it comes down to it after I create I'm a better person.  I'm calmer, more grounded, and ready to tackle those zillion things.  So I guess I'm taking the time to say I'm worth it and allowing myself the sanity.  What about you?  Have you noticed this about yourself after creating?  Do you think you're worth it?  I do.  The housework will always be there, but your state of mind and being is something to care for peeps.  Real talk. 
 
 
Some days I just play and art journal.  These are the new foam ScrapFX Feather Stamps - can we say smitten?  I think so.  All I did on this day was stamp, stamp, and prep a journal background.  No clue what I was going to do - just playing - and it was FUN! 


And from my playtime spurs ideas - this is what I'm finding so neat - because I'm not pushing myself so hard to come up with the next big thing my brain is freely open.  I'll be honest in sharing its been a bit since I've felt this loose and carefree in my creating.  Its easy to get caught up in what might be eye catching and I felt like I was losing myself - it was almost uncomfortable to create - a struggle!  Am I the only one who has felt this?


You cannot grow without practicing.  Some things will turn out lovely, others not so much, but practicing is key to growth - making time for that practice beyond the DT pages, or challenge entries, or, or, or is even more key.  I've A LOT of disasters in a baggie that I use to hack up in to bits - haha - they are hideous as whole pieces but sometimes when cut down, punched out, they can work. ;)


A huge thing I desire to grow in and am practicing is my lettering.  I adore letters, being a former early childhood teacher and all how could I not, right? and my printing is something I'm proud of.  I worked on perfecting it for years, thanks to my third grade teacher who had the best printing eva'!!  Shout out to Mrs. Vinton wherever you are, thank you for instilling the love of outstanding printing in me.  But when it comes to other fonts and such I lack.  So I bought the book Creative Lettering - it is marvelous - and I dove in to practice.  This piece is totally inspired by Lori Vliegen of Elvie Studio.  I've longed admired her lettering and work so it was a natural draw to try my hand at her way of doing things.  I know as I go along I'll gain more of my own style and spin on things but for now I practice.  What are you wanting to learn/practicing?


Whatever it may be I say let go of your fears & soar!  You have nothing to lose but everything to gain!!

And that my dear readers is my post for you today.  Some of the above closeups are up in full on the ScrapFX blog right now and if you'd like to see them I'd love to have you visit and let me know what you think.

Thanks so very much for stopping by today, take good care!

Monday, September 9, 2013

A Beautiful Mess - Skissedilla #224

Hello, hello!  Happy Monday to you!  Its that time of week when Skissedilla has just put out a new sketch for you to join us in playing along with.  I've been dying to share my page because I was so thankful to finally have some LO mojo back!!  Do you ever get in those slumps?  Where it just seems like no matter what you put together it just doesn't seem to flow right?  Yeah I was there.  Anyhoo, the following sketch helped me get over the hump - YAY!


The lovely Linda created this sketch and whether you're in need of getting over a scrappy slump like I was or just love to use sketches as your starting point ( this is me too!  love me some Skissedilla sketches :D ) I do hope you take some time to hop on over, be inspired by the fantabulous creations from the other DT gals, and join on in!

My page started with some background play to create a rainy day effect.  I had some fun with mists and watercolors over the top of the stenciling I did with my ScrapFX Clouds and Raindrops stencil (after it dried completely - ahh the agony of waiting!).  In my head I had envisioned something bolder turning out but in the end I really like how subtle the effects actually are.  Up close and personal they are a tad more vibrant.


This is the entire top portion of the 'rainy' background.


I then moved on to playing with the new ScrapFX stamps!!  Oh me, oh my they are fantabulous.  More on this soon as I have my reveal coming up for this release, but gosh I'm having a ton of fun with these.  I used a variety of mediums to stamp and emboss with and varied the materials I stamped on also to create a little scene.  What I love is this is very much what the fields around our house look like!

Finally all of it came together with my picture and some paper layers, my ScrapFX chippies, and some additional embellishments to create my page - A Beautiful Mess.  Indeed she was - LOL.  After so many rainy days here throughout June our fields were flooded badly.  My baby girl decided when it was finally a clear day she'd go exploring and check them out.  Well when she walked out in what she thought was a safe area she discovered the mud wasn't so forgiving.  She got stuck and had to really work herself out of it and this is what she came back looking like! O.o  Totally funny.

So there you have it - after the rain, comes a beautiful mess so always weather the storm. 

Have a really terrific Monday friends!

Monday, September 2, 2013

10 Years Strong

Greetings!  So happy to be here.  A few technical glitches have made it frustrating around these parts but thankfully things are better.  My hubs still isn't all too happy with Apple and thinks I should give up using the brand but.......that is a discussion for another day ; )

Instead we'll discuss the anniversary I just celebrated! WooHoo!!  10 years married to my best friend as of August 29 - we've been together 14 and half.  This bunch of sunflowers came home with my hubby as a surprise to kick off our celebration.  They're my favorite flower and came from a little roadside stand around the bend from our house.  I love that he knows just what to bring me to put a smile on my face from ear to ear - and he was so sweet to drive out of his way to get them after a super long day at work.


This is a throwback page from last year's anniversary.  I wanted to include a picture of us in this post and since we've yet to get one together this year..... I resorted to this which is fun because its crafty too! :D

Lots of fun ScrapFX chipboard pieces used on this page, along with some Glitz Design papers, and washi tape.  The glittery word strips were made with a Crafter's Workshop stencil and I should really get a tutorial going for that technique.  Its super easy and fun, fun!


Flash forward to this year and here is the card I created for him.  Kind of funny it has a lot of the same elements going on, huh?  Even right down to the doily! Wow, weird.  

On this card (sorry for the terrible shot) I created my own woodgrain background using the ScrapFX Wood Grain stencil and some paste to start off with the misted it up with a variety of Lindy's Stamp Gang mists.  Once it was all dried I went over it in spots with the ScrapFX Heart Confetti stencil and ink.  Then it was just a matter of playing with layers.  I'm really diggin' PL cards for actual cards right now.  I picked up some Me & My Big Ideas ones from Ms and love them for this!  I'm sure they'll make their way in my PL album too, but for now this is what I've been using them most for and have thoughts of ways to cut them up for LOs, AJ pages and tags too!  LOL

So that is how I've been spending the long weekend - enjoying time with the one I love and our kids.  Hope you've been having a great one too!