Wednesday, September 14, 2011

Check It Out

Say what, say what. Check it out, say what. LOL....sorry 'bout that. I've been watching a lot of high school football and this year DS has cheerleaders so I digress... anyhoo you SHOULD check out the Scor-Pal event that just went live at Scrapbook News and Review tonight!

My fellow staffers and I had a great time coming up with inspiration, classes, and tutorials for you so be sure to take a peek.

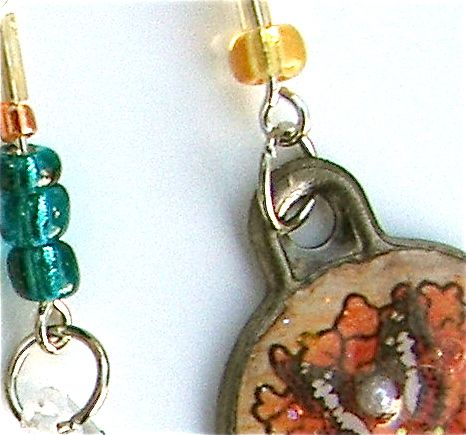
Speaking of peeks, here's one of something I created for the event:


This is a snippet from one of my class projects. Head on over to see the full step by step instructions.

That's it for tonight, off to go create. I've got a zillion ideas running through my brain so I'd better do something with them, huh?

Hope you had good days, catch you all later.
~Scarlett


Monday, September 12, 2011

Look What Came Today and Some Painted Papers

Hey there Peeps! Happy Monday to ya'. Did you have a good one? The day flew by here and left me with feeling I hadn't gotten nearly enough done. Alas, the night is young and my nap was hefty, LOL!

So I am totally JACKED up about what came to my house in the mail today! Check it out:


Oooo-la-la, right? This fabulous stash of chipboard and dyed doilies came from Leeann Pearce's Etsy shop, The Chip Chop Shop. She is based in Australia and I seriously can't say how excited(overly) and pleased(extremely) I am with my purchase. The only problem is I wish I would have gotten more right from the jump. LOL. Anyhoo, check out her blog, she is fantabulously talented and her shop, I can't wait to alter these bad boys up!

So, over the weekend I was working on some assignments and decided to paint up some papers to use for backgrounds, collage, whateva'. I used Canson Mixed Media paper for all the squares. This is what I've got going on so far:


On this one, I brushed on a layer of gesso and then used a homemade stamp to leave an impression. The stamp is made out of nuts or bolts (always get them mixed up, LOL) and I'll share a tut on how to make your own sometime this week. After that dried, I brushed on some Lumiere paint and then stamped with Ranger Archival ink to create the pattern. The last thing I did was add some Diamond Glaze to the hearts. I want to go back over this with some more paints to have the resist effect show through.

Here you can see the texture a bit better:


For this one I brushed on some gesso, scratched into it in certain areas, and painted. Then I stamped some hearts using a sponge stamp, outlined them, used a stencil to get the yellow hearts down with paint, and drizzled some fluid acrylics. To get my splotches, I had fun playing with an eye dropper and blowing bubbles.

Here's the last one:


This is my fav of the bunch. Love, love the greens and hints of blue. This one was created by brushing on gesso, stamping into it with a sentiment stamp (you can vaguely tell, but the imprint is there), painting over it with fluid acrylic paints, and then using a patterned paper towel to lift up some of the color. I love the effect it left. I continued on by outlining the heart imprint left from the sentiment stamp with my Zig marker (pen? never sure what to call it) and then I painted that in with a magenta fluid acrylic. The last thing I did was to mix up my own embossing powder to use on another sentiment stamp, which I stamped over the hearts.

Here's a close up:


You can really see the shimmer of the embossing powder in this shot, as well as the imprints of the letters 'I' and 'U'. Can you see them?

Alrighty that's it for tonight. Lots of fun stuff coming up this week at SNR so be sure to check back to see the haps.

Thanks for stopping by, hope your day was filled with smiles.
~Scarlett


Friday, September 9, 2011

Friday Haps

What's shakin' blog friends? Not much here. We survived the first week back to school, have had quite a few football games to attend at the high school, and DD is at her first official dance tonight. It's amazing she actually got out the door with all the clothes changing that was going on, LOL! Oh I remember the days well.

So let's see, I just posted my second Donna Salazar class over at Scrapbook News and Review on the front page. Here's a snibble of what's in store for you:


Sorry for the blur, but I had to crop close. You can check out the entire workshop by heading here.

In other scrappy news, the ABC crop is in full swing over at My Sketch World. The first week deadline is the Sunday night at midnight Eastern time. I haven't even started yet, but that's okay because this weekend is free of new challenges. Perfect time to catch up or join on in if you haven't yet.

Finally some projects to share. These are from last year toward the beginning of the school year. I don't think I've shared them here so now seemed like a good time. =)

Favorite Teacher


Lots of October Afternoon goodness on this LO. I mixed some Cherry Hill with Report card and threw in some Jillibean Bean as a background. I had a blast digging through my stash to find all sorts of school related embellies to include on this page and then I layered away.

10 Cool Things About You


This Lo is a mix of Sassafras Lass and Jillibean Soup, along with some Cosmo Cricket rub-ons and Sass chipboard. I was thrilled with how this page came together and since 2 years have passed since I did a page like this about my son, I guess I better get at it again, huh?

And since our county fair just wrapped up over Labor Day weekend, how about a set of county fair inchies to end the day with.


Very simple, but will certainly be a cute accent to a project with our fair pictures or maybe an art journal page with these on it and some journaling about the tradition we've started since moving to our town.

All of the above projects were previously published in past issues of SNR.

Hope you have a fabulous start to your weekend, thanks for stopping by.
~Scarlett


Saturday, September 3, 2011

Extra! Extra!


Read all about it over at Scrapbook News and Review. The Donna Salazar event is up and it's HUGE, lemme tell ya'! There are numerous classes, tutorials, and tons of inspiration posted for you to delight in.

I had the pleasure of being a part of this team along with many other SNR Staffers. I've got one class posted and another coming, along with some eye candy pieces.

Here's a sneak of one of my projects:


Head on over to SNR and discover what thread this is in and have a blast checking out what other projects are there!

Friday, September 2, 2011

At Last.....Flower Tut for You!

Hi Friends! Well I did have this all drafted and then a few things took me away from blogging for a minute so I decided to start all over. New month, fresh post, right?

So without anymore chatter here's the Felt Flower Tutorial I promised (albeit late... :( sorry)

This is the ATC I shared in a previous post showcasing a tiny version of the flower we're going to make:


Let's get started!


Step One: Cut a piece of felt 9" long by 1.5" wide. Run a line of adhesive along one edge and fold the other edge over to meet it. Secure the edges together making sure not to squish the loop formed too much.


Step Two: Cut fringe into the loop edge of the folded felt. In this picture I cut the yellow piece in half so you can see it's the same process no matter what length of felt you're using.


Step Three: Begin rolling the fringed felt. Start from one end and roll until you reach the other end. Secure the end with adhesive.


Step Four: Fluff up the flower loops by using a chop stick or other tool. Adhere to your project for a fun custom made flower.

Easy enough, right? I'd love to see if you do anything with these flowers so be sure to leave me a link if you do.

I'll be back again soon with some more projects from SNR to share. In the meantime if you're looking for something fun to do head on over to My Sketch World. There's an ABC crop going on right now and you won't want to miss all the fun in store this month!

Hope you have a fabulous day!
Scarlett