Friday, December 17, 2010

Some New Cards to Share

Happy Friday!! I have been waiting to share these cards with you and today I was finally able to get some decent shots of them. Gotta love winter, right? I so wish I knew how to better use the photo editing on my computer. It's nothing fancy, but it's there, LOL!

The cards I am going to share were created using Just Rite stamps, the stamping featured manufacturer of the month at A Walk Down Memory Lane. Right now you can pick up a set or two of these for yourself for 25% off, along with the same discount for all The Girls' Paperie products.

Just Because

I used some of the fabulous Modern Homemaker line from October Afternoon for this card. It just arrived in the store and it's a must have if I do say so myself. I love the patterns and colors. Did you notice how the stamp has the sentiment in the middle and then a stamped border around the edge? Well, that's a super feature of the stamps from Just Rite, they have interchangeable borders to go with each sentiment.

My 2nd card was created using the Sunday sketch from the 365 Cards blog. It's been so long since I played along!!

Thank You

Again I used the Modern Homemaker line and a Just Rite stamped sentiment and border.


I had to do a close up of the flowers so you could see they appear a bit fuzzy. I used some Flower Soft, available in the AWDML store, to create this look. I have had this stuff for a long time and am just finally getting around to use it.

Well, that's it for tonight. Hope your day was really wonderful and filled with something joyful. My daughter had her last Holiday program as an elementary student. Kind of sad to know she'll be off to middle school before I know it, but it was a great concert and I was soo proud.

Thanks for stopping by to visit me! Blessings to you!


Monday, December 13, 2010

Scrapbook News and Review Issue #12....

Is now available!!! It's the Holiday Sampler and you are going to LOVE it!!! It is full of so much inspiration to help you get those LOs from last year scrapped (if you're anything like me, LOL!), finish up all those cards, create beautiful gifts, and so much more!!! Be sure to head on over to Scrapbook News and Review Magazine to sign up for your subscription.

Here's a peek at a project I have in this issue:


Jolly Old? by Scarlett Salamone Supplies Cardstock: Bazzill; Patterned Paper: Cosmo Cricket, Echo Park, October Afternoon; Letter Stickers, Embossing Powder: American Crafts; Trim: My Mind's Eye, The Girls' Paperie; Journal Spots: Jillibean Soup; Stickers: October Afternoon; Buttons: All Dressed Up; Ink: Martha Stewart; UTEE, Pigment Powder: Ranger; Markers: Martha Stewart; Punch: EK Success; Other: Rhinestones

I love this picture of my baby who is now 14!! He was just a gigglin' away and having a jolly old time at Nana's House a few days before his first Christmas.

Hope you are having some jolly days and taking time to enjoy the little things this Christmas season.


Thursday, December 9, 2010

Christmas Home Decor Inspiration

Happy Thursday my friends! Don't you just LOVE Christmas time!! I know I do. It's my favorite holiday and creating things using all the fabulous winter and Christmas stuff out there is just a joy to me. Today I want to share with a bit of inspiration to create a tree to deck your own halls! I have been wanting to do up a Christmas tree since last year when I bought the styrofoam bases. I just ran out of time last year, but this year when I saw the trees Lolly Chessie created for Crate Paper's summer CHA release, an idea was born and I knew I was going to finally do up a tree when I could get my hands on the Snow Day line! So that's what I did.

Snow Day Christmas Tree


I started the tree by painting the styrofoam base green, just in case it peeked through in any areas. Then I cut a TON of paper strips, looped them in half, and pinned them to the base.

Next, I went through my ginormous drawer full of ribbons and trims and picked out some I thought would be fun to add for garland. I used hot glue to hold it in place at the top and just began winding it around, tucking it here and there.

I knew I wanted a star up top, but wasn't exactly sure how I was going to do it at first. Then I remembered I had just gotten some Tim Holtz Memo Pins and found my Sissix star die. Perfect fit! I sprayed the star with some Tsukineko Psst! Shimmer Spritz. I wish you could see just how sparkly this stuff is. If you haven't tried it, you should. It is amazing and blows away all other mists.

The last thing I did was to create all the little ornaments for my tree. I used a lot of Crate Paper Snow Day diecuts along with some sequins. It is truly amazing how many sequins I have! So glad to finally have used some up.
I am just really thrilled at how this turned out and told my wonderful hubbie we should use this as our tree this year! LOL! We have a couple mischievous kittens that seem to think our tree is their jungle gym.
I am going to leave you with a few more pictures of the tree so you can see some of the ornaments up close. Sorry if it's overkill, but I just really had a lot of fun with this.


Thanks for stopping by today!
God's Blessings to you!

Tuesday, December 7, 2010

Tutorial for Tuesday

I shared this tutorial on the A Walk Down Memory Lane DT blog for the 12 Days of Christmas going on over there and I thought it would be a grand idea to share it here for all my bloggy friend too! I will put out a little disclaimer that I am still working on perfecting this lil' poinsettia, but you will get the idea of how to try and perfect one of your own! Sorry in advance for the dark photos. It's so hard to get good shots in winter isn't it? I have to talk DH into helping me out on that front. So enough blabber and on to the tutorial!

Here is the flower we will be making:

I used October Afternoon's Good Cheer papers for this.

Step 1:


Cut 12 strips of paper to 3"x.5". You will use 6 now and 6 later in the tutorial.

Step 2:


Fold strip in half.

Step 3:


Fold strip in a diagonal, creating a flat bottom V.

Step 4:


Fold strip diagonal again in the opposite direction.

Step 5:


Push in sides of strip at the folds you created.

Step 6:


Fold strip in half to look like above picture and place a glue dot at the end to hold in place.

Step 7:


Crease folded piece lengthwise and then fold over edges.

Step 8:


Pinch ends together and place glue dot to hold in place. You may have to play with the shape of you petal a bit to get it the way you would like it to look.

Step 9:


Repeat steps 1-6 with remaining 6 strips. Punch out circle for base of flower. Adhere folded pieces to circle. This is what it will look like when all pieces are placed:

Step 10:


Adhere the first 6 petals you created onto the circle in between base petals. You are ready to embellish the center.

Step 11:


Embellish the center to finish off your flower.

So there you have it. I must say this does take a little bit of time to create, but I am looking forward to trying out another real soon. I'll come back and share when I do because I am hoping it will be even better!

Hope you have had a beautiful Tuesday! Please scroll down to see the address to send a recovering American soldier a card this Christmas.


Monday, December 6, 2010

Gettin' Down with Some Fussy Cuttin'!!!!

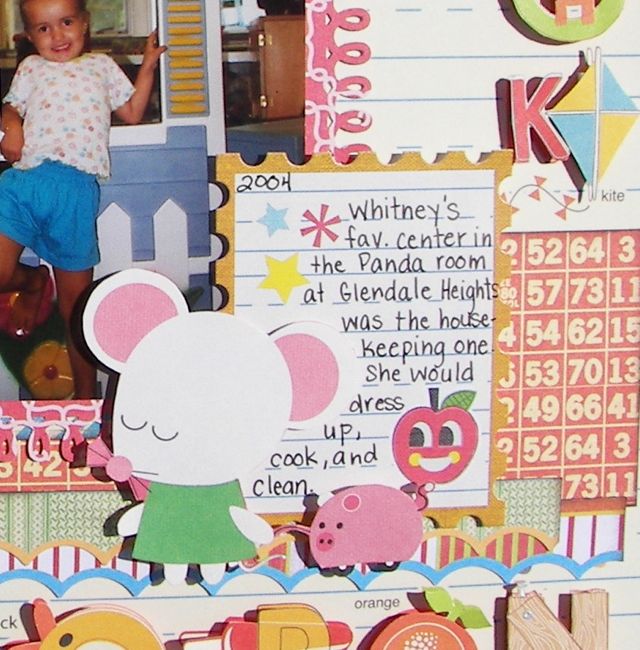
Happy Monday! I have been doing lots of thinking lately about what brings me joy. There are so many things: a wonderful husband who adores me and would do anything in the world to make me happy, two great kids who are doing great in school and learning how to be more and more responsible everyday, fantabulous friends both IRL and online, and oh so much more! As far as scrappy joy goes, well I don't even know where to begin with all that, but off the top of my head I would have to say fussy cutting brings me lots of joy. I love being able to take a piece of paper, cut it all up, and then use it to create whatever my lil' heart desires. So I was elated when one of the assignments I signed up for at Scrapbook News and Review Magazine was for fussy cutting! This LO debuted in the June 2010 issue and I am finally getting around to sharing it.

Playin' House


I absolutely adore Sassafras Lass papers for fussy cutting! The possibilities are always endless and really make this whimsy at times scrapper happy! I used papers from the Apple Jack and Nerdy Bird collections, along with some other Sass scraps.


I had a lot of fun dressing up certain fussy cut items to give them a unique look and to add a bit of additional dimension.


I am so thankful my daughter went to preschool #1 where I worked and #2 where people loved her soo much and took so many pictures of her throughout the years we were there. It means so much to have these moments captured.


A peek at the dimension the LO has.

So there you have it a great example showing my love for fussy cutting. If you like this LO, you should see all the other ones that were published for this call in Scrapbook News and Review Magazine! Awesome for shiggity!! If you don't have a subscription yet, I'm not sure what you are waiting for. You can access all the way back to a year's worth of information and projects. The new Holiday Sampler mini issue will debut on the 12th and you surely won't want to miss out on all the great projects there are in store! Be sure you get yours today.

Hope you have had a beautiful Monday! Please scroll down to see the address and post I have about Making a Difference. It's an easy peasy way to brighten up someone's day.